Sometimes, the problem with a webpage is not the whole webpage.
Sometimes it is one section.
A sidebar. A comment box. A distracting image. A live chat widget. A price panel. A suggested-content feed. A piece of information you do not want visible while recording, sharing your screen, working around others, or simply trying to focus.
That is the basic idea behind Screen Region Blockout.
It is a Chrome extension created by Jays n Dees that lets you block out selected regions of a webpage. Instead of trying to change the entire site, you choose the area you want hidden and apply a visual blockout effect.
Why Screen Region Blockout Exists
Most browser tools work at the page level.
They block ads. They hide trackers. They change themes. They remove elements. They modify full pages.
Screen Region Blockout takes a more practical, visual approach.
It lets you select a specific part of the page and cover it, without needing to edit the website itself. This can be useful when the page is technically fine, but one part of it is distracting, sensitive, unnecessary, or simply in the way.
A Few Everyday Uses
Screen Region Blockout may be useful for:
hiding sensitive information before screen sharing
covering distracting webpage areas while working
blocking sections during demonstrations or tutorials
hiding comment areas, sidebars, or suggested content
reducing visual clutter on frequently used pages
keeping certain on-screen information out of view around others
It is not designed to be an ad blocker, and it is not intended to replace privacy or security software. It is a visual blockout tool for selected areas of a webpage.
How It Works
The workflow is simple.
Open a webpage, activate the extension, then select the region you want to block out.
Depending on the settings available to your licence tier, you can apply different visual effects such as blur, solid colour, or pixelation. The extension stores your selected regions so they can be restored when you return to the same page.
That means you can set up a page once and keep using it with the same blockout layout later.
Lite and Paid Licence Options
Screen Region Blockout includes a Lite version so users can test the basic workflow before upgrading.
Paid licence options unlock broader use, depending on the tier selected. This allows the extension to remain useful as a free tool while also supporting larger or more advanced workflows for people who need more flexibility.
The paid licences are available through the Jays n Dees e-store.
Why This Is Useful for Screen Sharing
One of the strongest use cases for Screen Region Blockout is screen sharing.
It is easy to forget how much information is visible on a page until someone else is watching. Browser tabs, account panels, usernames, balances, messages, customer details, sidebar widgets, and other small page areas can all become visible at the wrong moment.
Screen Region Blockout gives you a simple way to cover only the area that matters.
This can be useful for:
online meetings
tutorial recordings
product demonstrations
support sessions
livestream preparation
working in shared spaces
It does not replace proper security habits, but it can add a useful visual privacy layer.
Why This Is Useful for Focus
The other major benefit is focus.
Some pages are full of content designed to pull your attention away from the thing you opened the page to do. Related articles, recommended posts, sidebars, popups, account boxes, comments, and visual clutter can make it harder to stay on task.
With Screen Region Blockout, you can visually remove those areas from your working view.
You are not changing the website permanently. You are simply making it easier to use the page in the way that suits you.
A Small Tool With a Specific Job
Screen Region Blockout is not trying to be a massive productivity suite.
It does one clear thing:
It lets you block selected regions of a webpage.
For the right kind of user, that can be surprisingly useful.
If you regularly work with webpages that contain distracting, sensitive, or unnecessary visual areas, Screen Region Blockout may be worth trying.
Where to Get It
Screen Region Blockout is available through the Chrome Web Store.
If you want a simple way to cover selected parts of a webpage without editing the website itself, Screen Region Blockout was built for exactly that kind of job.
Many systems in life appear simple at first glance.
A weekly routine. A meal planning habit. A household rule. A small financial system.
These structures often begin as informal ideas – something that seems sensible and works well enough in the moment.
But something interesting happens when those systems are tracked over time.
Patterns begin to appear.
What once seemed like a small routine gradually reveals how it interacts with other parts of life. The system either strengthens, adapts, or eventually stops working.
Tracking systems turns casual habits into observable processes.
And observation tends to reveal far more than expectation.
Most Systems Start As Rough Ideas
Very few systems begin perfectly designed.
More often, they begin as simple solutions to everyday problems.
At the beginning, these systems usually exist only in practice.
They are followed because they seem helpful, not because they have been formally analysed.
Tracking changes that dynamic.
Observation Creates Feedback
Once a system is tracked – even loosely – feedback begins to appear.
Instead of asking “Does this system work?”, a better question emerges:
How does this system behave over time?
Tracking reveals details that are easy to miss otherwise.
For example:
Does the system reduce stress consistently?
Does it fail during busy weeks?
Does it depend too heavily on one person remembering everything?
Does it create unexpected side effects?
Without observation, these patterns remain invisible.
With observation, they become easier to evaluate.
Time Reveals Hidden Friction
Some systems appear effective during their early stages.
But as weeks and months pass, hidden friction sometimes emerges.
For example:
A routine that works well during calm weeks may collapse during busy ones.
A financial rule that seems simple may become confusing when exceptions arise.
A digital rule for children may require adjustment as they grow older.
Tracking systems allows these points of friction to be identified early.
Instead of abandoning the system entirely, it can often be refined.
Documentation Prevents False Memories
One of the most useful aspects of tracking systems is that it removes reliance on memory.
Human memory tends to simplify the past.
Successes are remembered clearly. Failures are often softened or forgotten.
Documentation creates a more reliable record.
When observations are written down, they remain available for later reflection.
This record makes it easier to see whether a system truly improved life, or whether it only appeared to do so temporarily.
Small Systems Often Interact With Each Other
Another insight that emerges over time is that systems rarely operate in isolation.
A household system may influence:
meal planning
financial habits
daily routines
digital behaviour
For example, a weekly reset routine may indirectly support kitchen organisation.
A financial allowance system may influence how children think about spending decisions.
These interactions often become visible only after several systems have been running long enough to observe them together.
Tracking helps reveal these connections.
Systems That Survive Busy Weeks Tend To Last
One reliable test for any system is whether it continues working during busy periods.
Many systems appear effective under ideal conditions.
But real life rarely provides ideal conditions.
School events, work pressures, unexpected disruptions, and illness can all interrupt carefully planned routines.
Systems that remain functional during imperfect weeks tend to prove more durable over time.
This is why simplicity matters.
Simple systems are easier to maintain even when life becomes unpredictable.
Experiments Benefit From Tracking As Well
The same principle applies to experiments.
Many experiments begin with a clear question:
Is this system economically viable?
Does this method produce better results?
How do certain platforms behave under specific conditions?
Tracking the results over time often reveals the most useful insights.
For example, examining the real cost of GPU crypto mining showed that operational variables such as electricity consumption and hardware wear had a greater impact than theoretical projections suggested.
Meal planning for a large family sounds complicated on paper.
In practice, it doesn’t need to be.
With six people in the house – four growing children and two adults – the real challenge isn’t cooking. It’s managing the constant flow of meals, groceries, leftovers, and changing appetites.
Over time we discovered that strict meal plans don’t work very well for us.
Life changes too quickly.
Instead, we use a loose fortnightly meal structure supported by a single main grocery shop and small replenishment trips during the week.
The system is simple enough to survive busy weeks, but structured enough that dinner never becomes a daily crisis.
Why We Plan Over a Fortnight
Most meal planning advice suggests weekly plans.
For our household, planning over a two-week period works better.
Anchor meals reduce the pressure to invent new dinners constantly.
They provide stability within the meal system.
Leftovers Are Part of the Plan
One of the most important parts of feeding a large family efficiently is accepting that leftovers are not accidents – they are part of the system.
When cooking larger meals, we intentionally aim to produce enough for:
next-day lunches
an easy dinner later in the week
This reduces cooking workload and helps stabilise food spending.
Leftovers also make school lunches easier to manage, since prepared food can often be repurposed the next day.
Without this approach, cooking for a large household would require significantly more effort.
Ingredient Systems Reduce Grocery Stress
Instead of planning every single ingredient for every meal, we maintain a base ingredient system.
Certain items are almost always in the house:
pasta
rice
bread
cheese
eggs
frozen vegetables
sauces
pantry staples
These ingredients support multiple different meals.
If plans change unexpectedly, we can still cook something reasonable without another grocery run.
This approach also keeps grocery spending more predictable, something we discussed more directly when looking at the cost of feeding a family of six in Australia.
Flexibility Matters More Than Precision
Strict meal plans often fail because they assume every week will follow the same pattern.
In reality:
schedules change
children have activities
energy levels vary
A flexible meal structure adapts to these changes.
For example, if a busy day leaves little time for cooking, we can choose a faster meal from the list rather than abandoning the plan entirely.
This adaptability keeps the system practical.
The Role of the Main Grocery Shop
Our fortnightly grocery shop provides the foundation for the meal system.
During that shop we focus on:
staple ingredients
meat or protein options
vegetables that last well
pantry replenishment
This large shop ensures the kitchen is well stocked.
During the following two weeks we only need smaller replenishment trips for items that spoil quickly.
Because the major ingredients are already available, daily meal decisions become easier.
Small Systems Reduce Kitchen Stress
The real benefit of meal planning isn’t just food.
It’s reduced decision fatigue.
When the kitchen operates on predictable structures:
fewer last-minute grocery runs happen
dinner decisions become easier
leftovers are used effectively
grocery spending becomes more stable
Meal systems quietly support other household systems as well.
As children grow and preferences change, meals adjust as well.
Sometimes a recipe disappears from the rotation.
Sometimes a new one becomes an anchor meal.
Because the system is flexible, these changes happen naturally rather than requiring a full redesign.
The goal is not perfection.
The goal is reliability.
Final Thought
Feeding a large family will always require effort.
But it doesn’t have to require constant improvisation.
A simple meal structure – supported by a fortnightly grocery rhythm, repeatable meals, and intentional leftovers – can make a busy household kitchen far easier to manage.
Over time, these small systems remove a surprising amount of daily friction.
And in family life, reducing friction often matters more than finding the perfect recipe.
I started this fossicking trip with a bigger plan than usual.
The idea was to leave earlier, test the new metal detector, scout around the approximate Never Mind area, check a location I had marked from my own Prospect heatmap research, and then finish the day with another go at Site 4.
That sounded reasonable when I was planning it.
By the end of the day, my mind had certainly changed.
Not because the day was useless. It was actually very useful.
But it taught me something important:
One proper fossicking site is probably enough for one day.
There is a big difference between visiting a place and properly working it. Once I start looking at creek features, checking material, classifying, panning, saving concentrates, watching for possible colour, isolating suspicious material, taking photos, and making notes, the time disappears very quickly.
So while this trip began as a multi-target day, it ended up becoming mostly about one place.
Site 4.
And that was probably for the best.
The Original Plan
For this trip, I had three main goals.
First, I wanted to scout around the approximate Never Mind area. Not to enter any old workings, and not to do anything silly, but to get a better feel for the area and see whether the new detector picked up anything interesting.
Second, I had another location marked on my personal fossicking map. This was chosen from my own research using a Prospect heatmap, so I wanted to have a look and possibly sample a few areas there.
Finally, I wanted to end the day at Site 4.
Site 4 has been sitting in the back of my mind since my last visit there. I would really like to find some decent colour there, and it feels like one of those places that deserves more time rather than quick visits. It is one of those peaceful locations where time doesn’t matter. Nature just keeps progressing throughout the day.
I also had a new metal detector to test.
It is still a cheap one, but it felt sturdier than the earlier detector I had been using. That alone gave me some hope that it might be slightly less frustrating.
Possibly wishful thinking.
Why I Am Moving Toward One Site Per Day
The biggest lesson from the trip came before the gold, before the detector trouble, and before the concentrates waiting at home.
It came from the day itself.
Trying to fit multiple targets into one trip sounds efficient, but fossicking properly is not quick.
A single site can easily fill a day if I work it properly.
There is the walking around and looking. There is choosing a spot. There is checking the creek. There is classifying material. There is panning. There is watching how the heavies behave. There is looking for possible colour. There is putting aside interesting rocks. There is dealing with mica. There is saving concentrates. There is packing up. There is filling in anything that needs to be filled in and making sure the place is left tidy.
Then there are photos and notes if I want to turn the trip into a useful post later.
So from this trip onward, I think I need a simpler approach:
Pick one main site and work it properly.
That does not mean I will never scout around or check nearby areas, but the main effort should probably go into one location per fossicking day.
That should give me better samples, better notes, and less rushing.
Never Mind: A Scout, Not a Sample
The Never Mind part of the trip ended up being a scout only.
Once I realised the area I was looking at was outside the designated fossicking area, I did not take samples. That was the right decision.
I was interested in the area because of the historical connection and the way it appears on mapping, but interest does not override access rules. If an area is outside where I am allowed to fossick, then it becomes an observation point, not a sampling point.
I did still manage to make the visit memorable.
I stumbled into a hole, slightly injured myself, and broke one of my kit bags.
That was not exactly the kind of field result I was aiming for, but it was a useful reminder. Old goldfield areas, old workings, rough ground, hidden holes, and uneven terrain deserve caution. Even when I am not entering anything or digging anything, just walking around with gear can still create problems.
So Never Mind gave me no samples, no colour, and no detector treasure.
But it did give me a safety lesson and a broken bag.
Not ideal, but still educational.
The Heatmap Target
The second planned area was one I had marked on my personal fossicking map after looking through Prospect heatmap data.
Once I checked it in person, I realised it is actually quite close to where I have already taken my family fossicking.
That changes how I think about it.
Rather than treating it as a separate solo trip target, I think this area makes more sense as a place to work gradually during family fossicking outings.
That is still useful.
Not every marked location needs to become a full solo field day. Some can become smaller test areas over time.
So this target is not being abandoned. It is just being moved into a different category.
A future family-day testing area.
Site 4 Became the Main Event
Site 4 is where I spent most of the day.
That was not the original balance of the trip, but it quickly became the most useful part.
I sampled a couple of nearby areas, took notes for future attempts, and spent more time looking at how the creek behaves in that section.
One feature stood out to me.
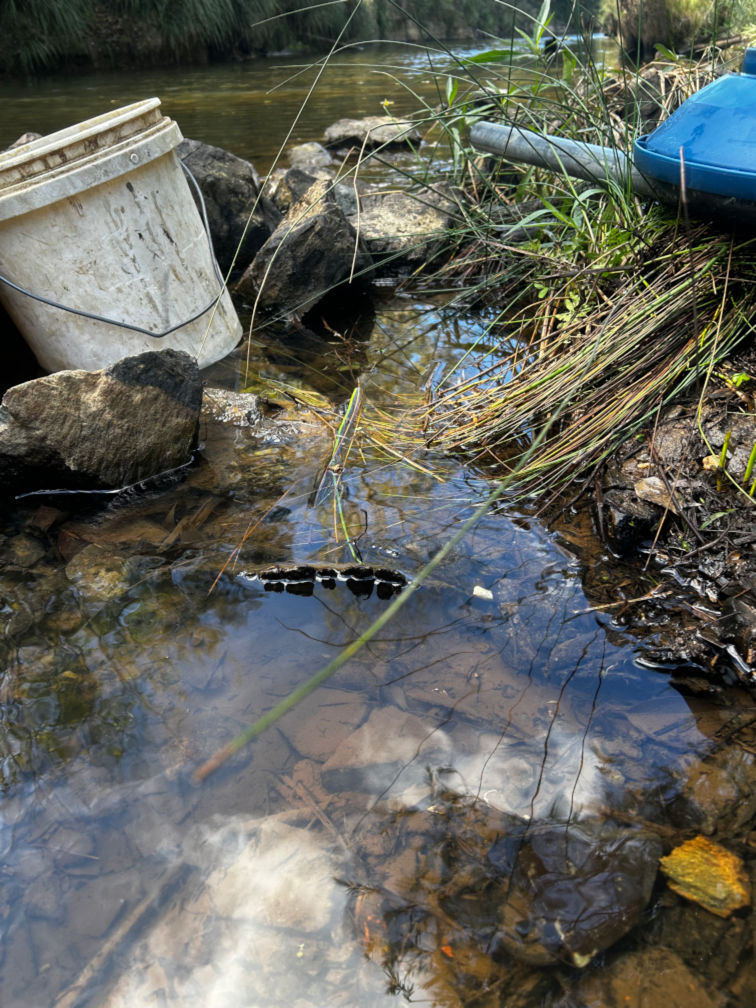
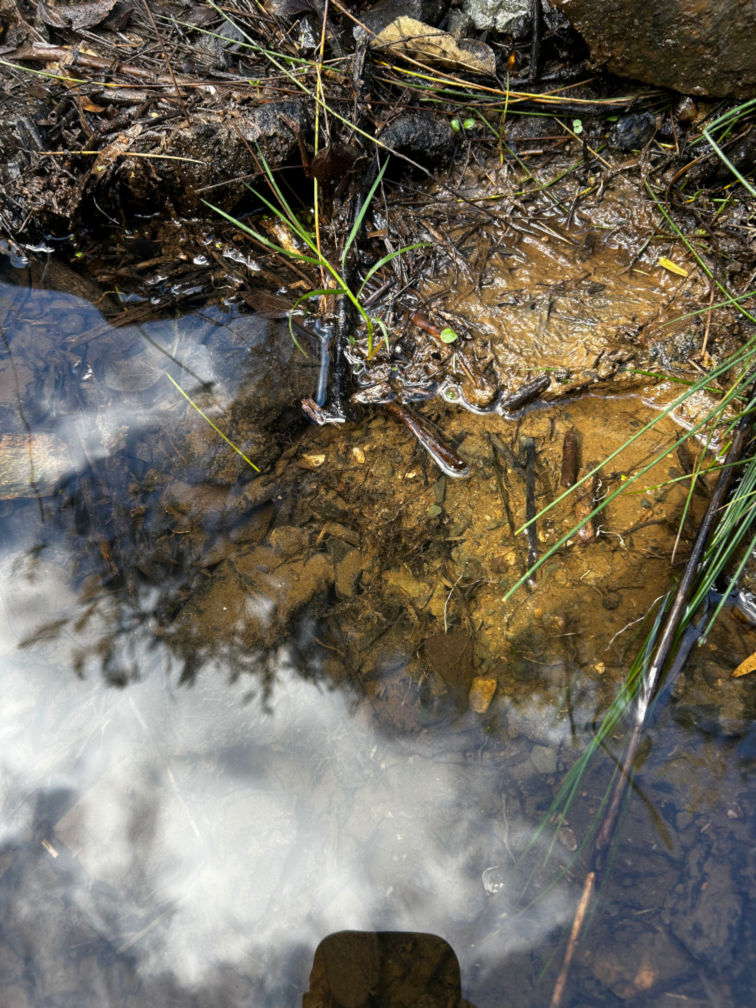
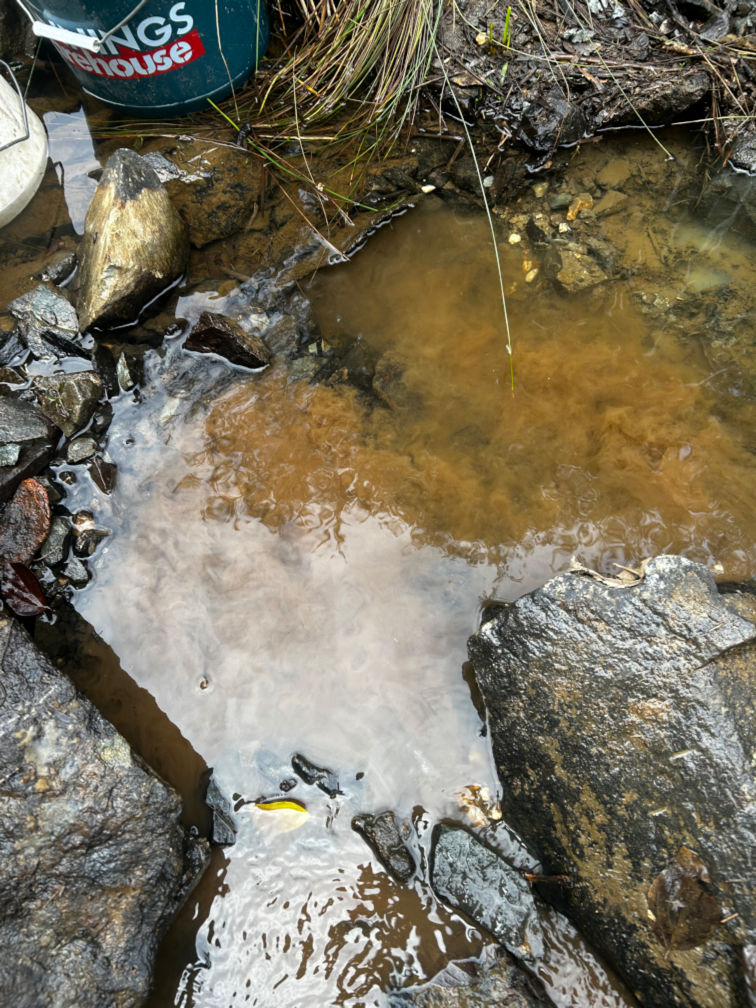
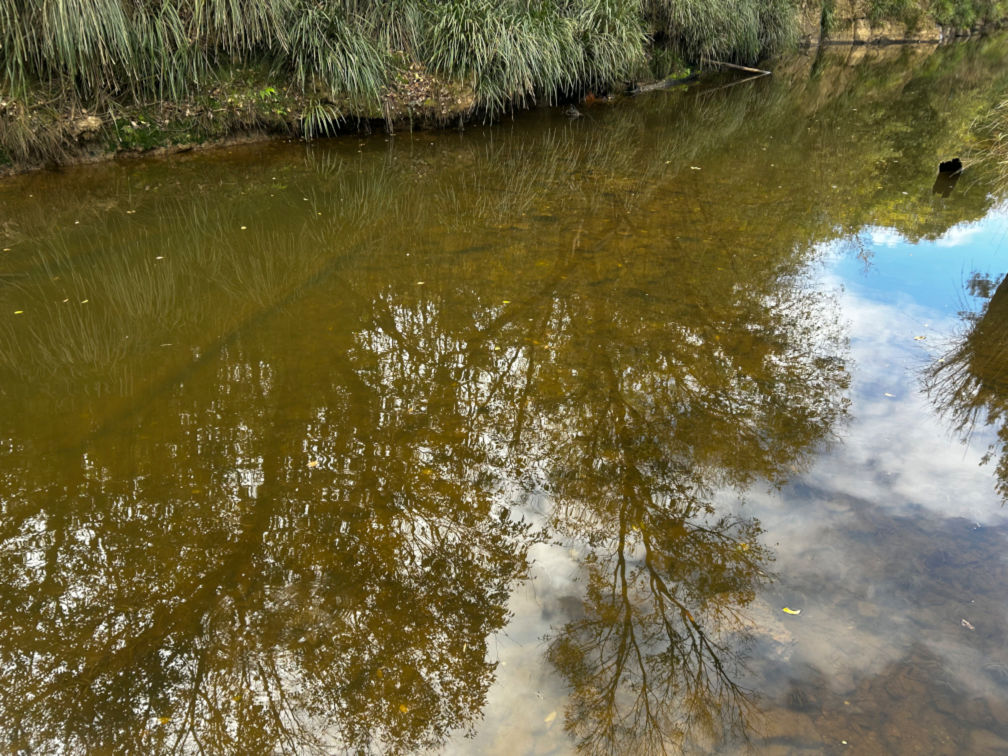
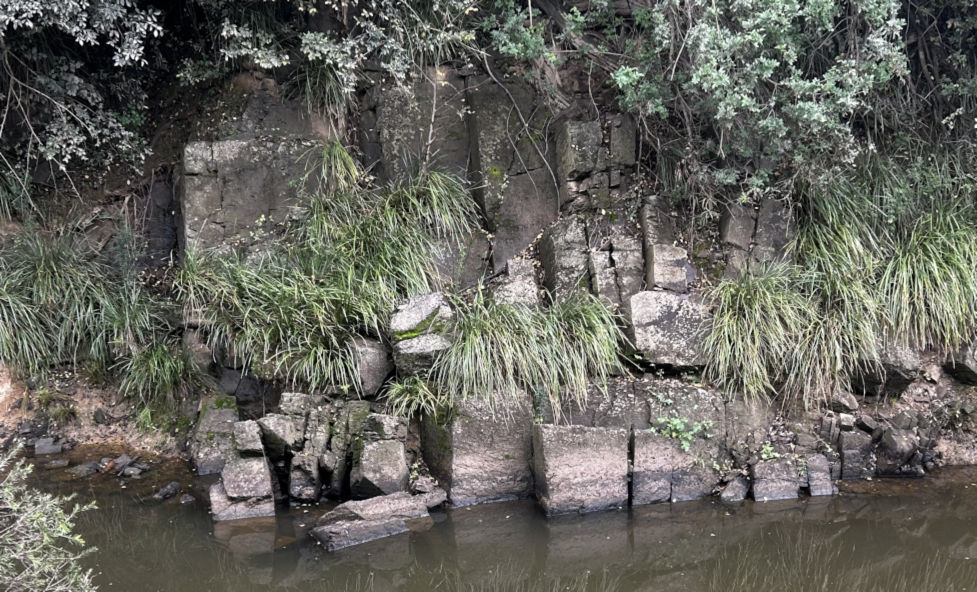
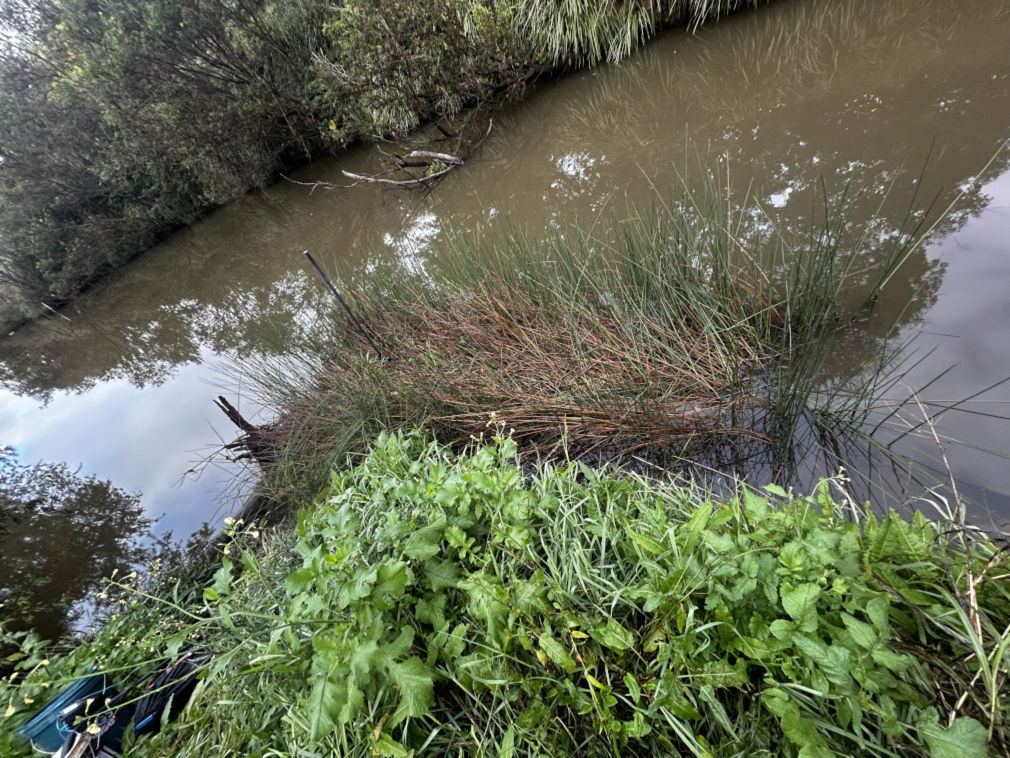
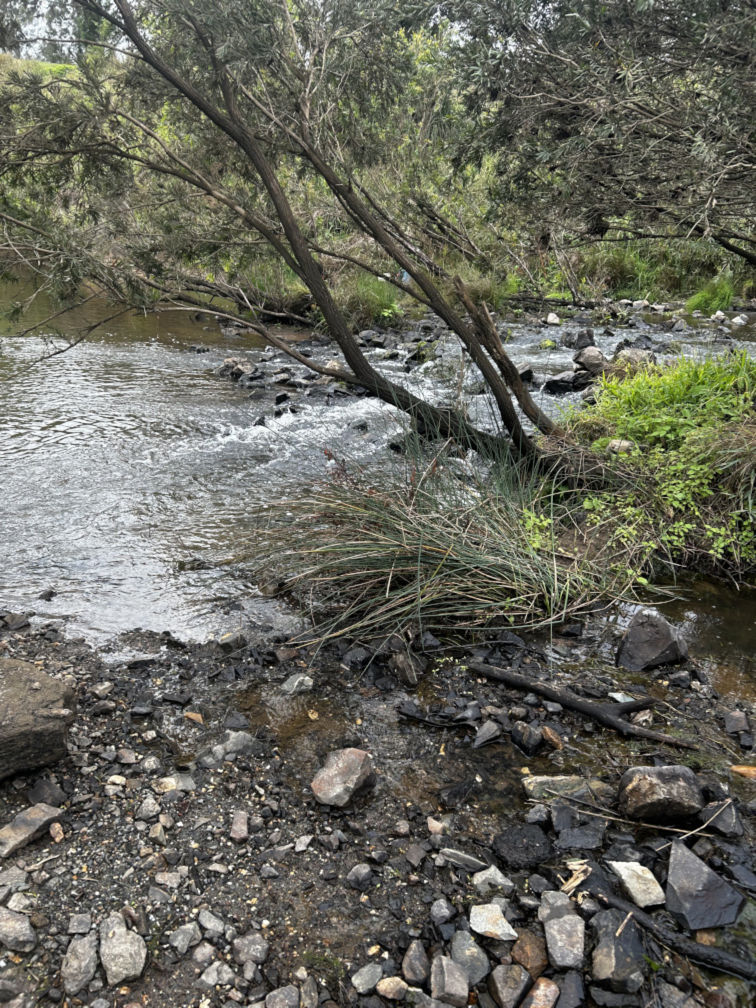
There is a section where the creek has deeper water, then crosses over a shallower gravel bar that runs across the width of the creek, before dropping off into deeper water again.
That caught my attention.
Changes in water depth and flow are exactly the kinds of things I need to start noticing more carefully. I am still learning how to read creek features, but this felt like a section worth remembering.
The shallow gravel bar and the deeper water either side may be worth testing more carefully on a future trip.
For now, it has gone into the mental notebook as a place to revisit.
Getting Stuck Into One Location
After taking some samples and looking around, I eventually set up my gear and got stuck into a single location.
That was probably the best decision I made all day.
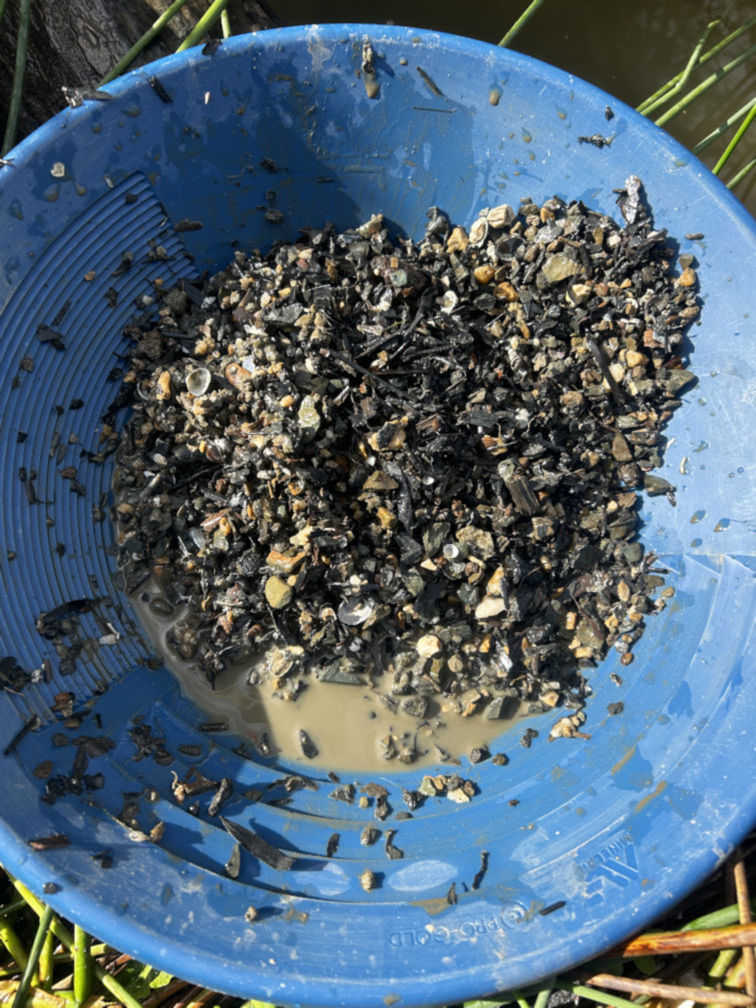
Instead of constantly moving, I worked pan after pan from the same general area. That gave me a better feel for the material and allowed me to watch for patterns.
The pans were not spectacular.
There was no dream nugget.
There was no obvious chunky gold.
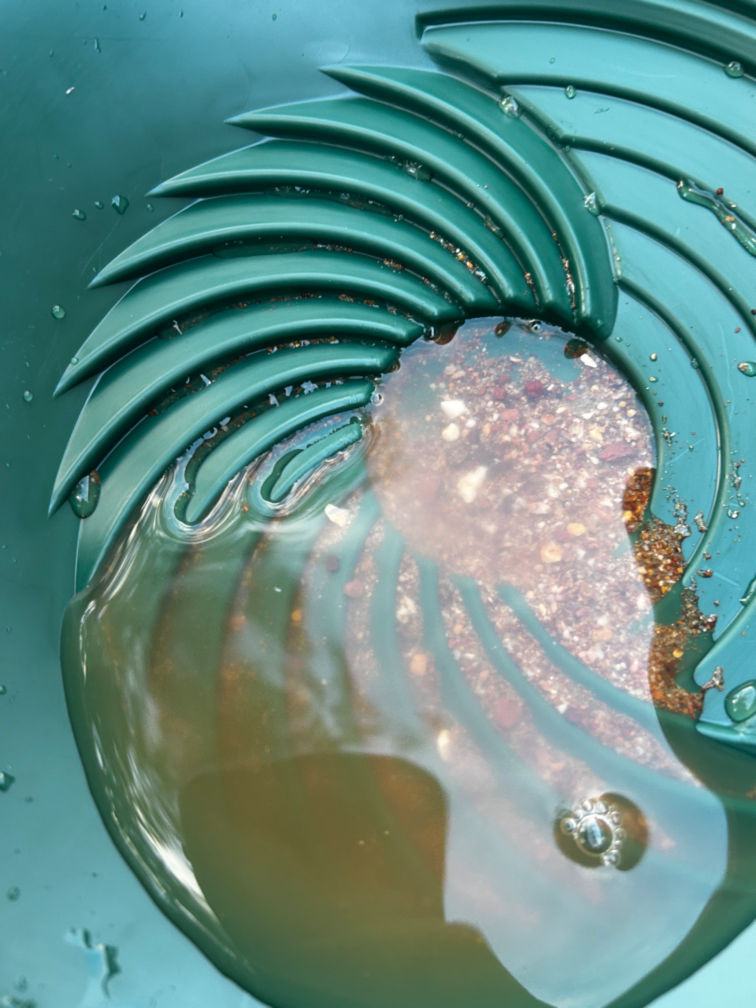
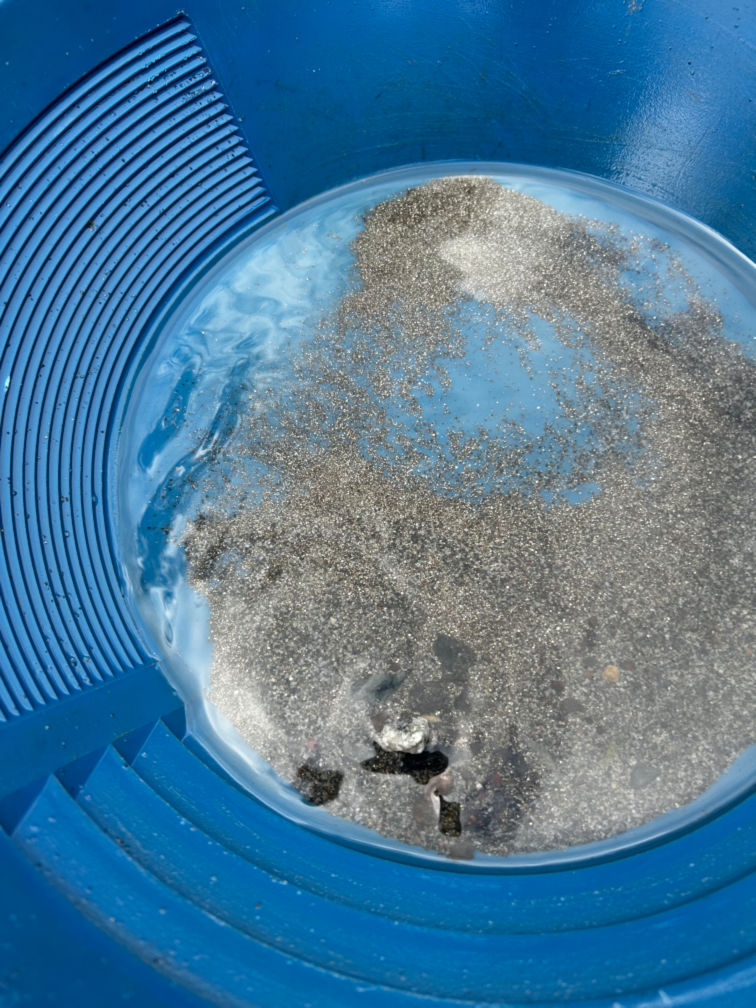
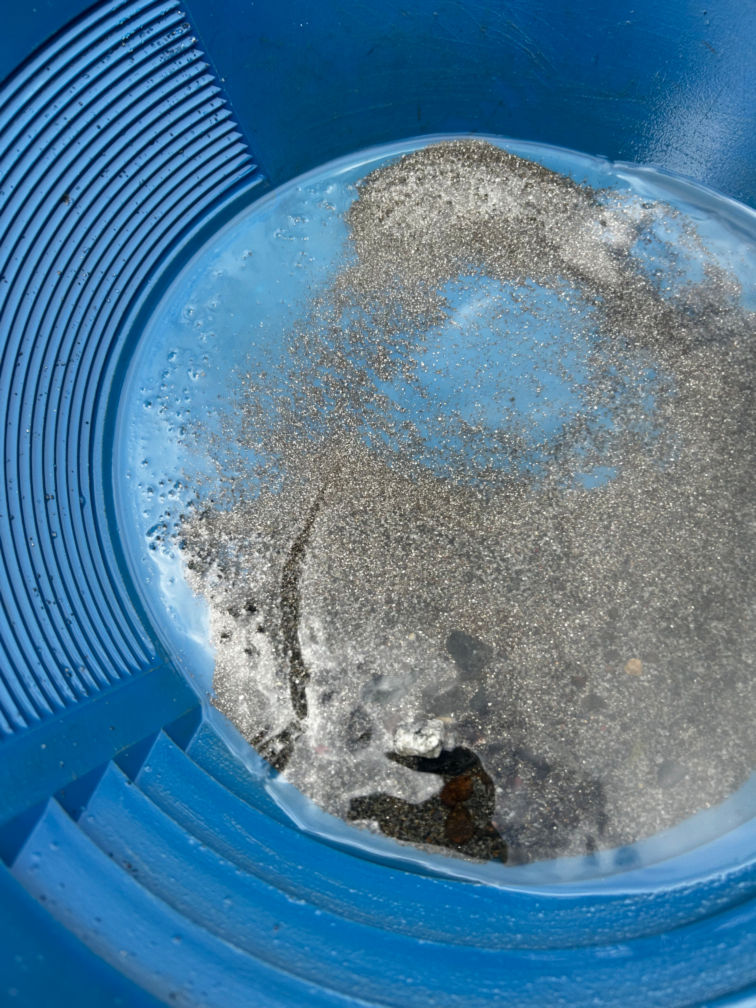
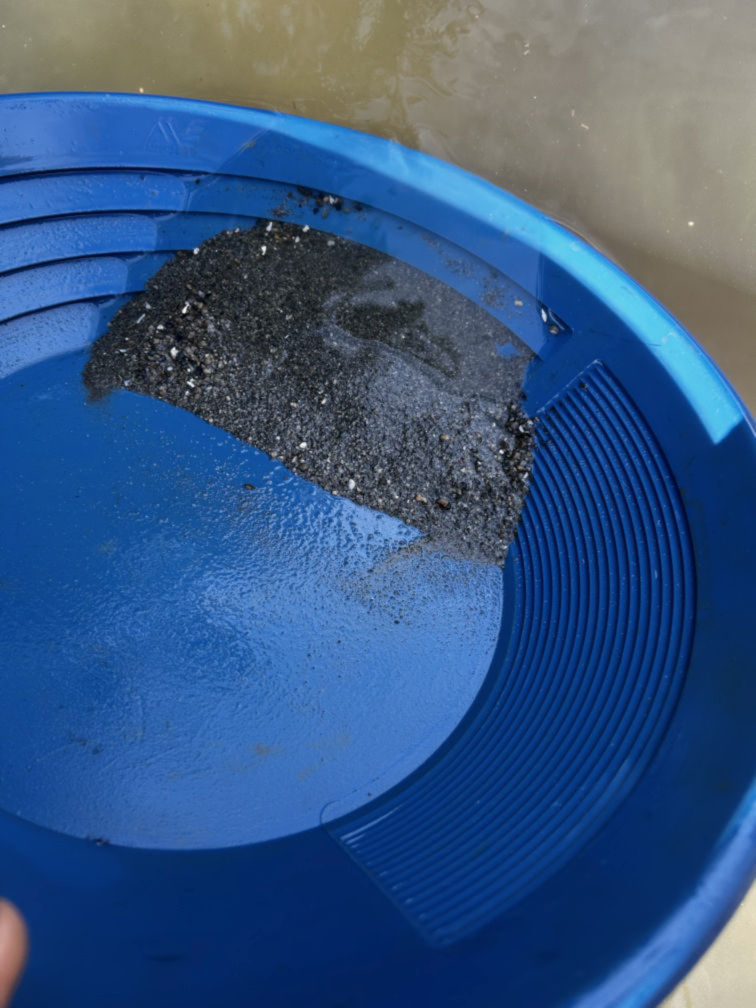
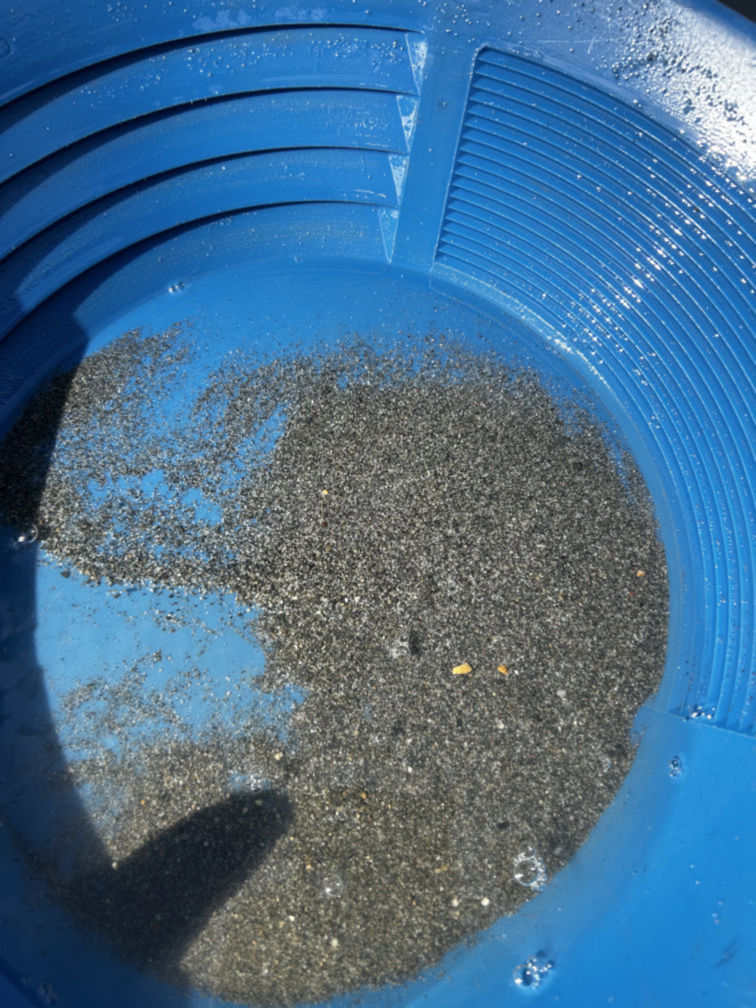
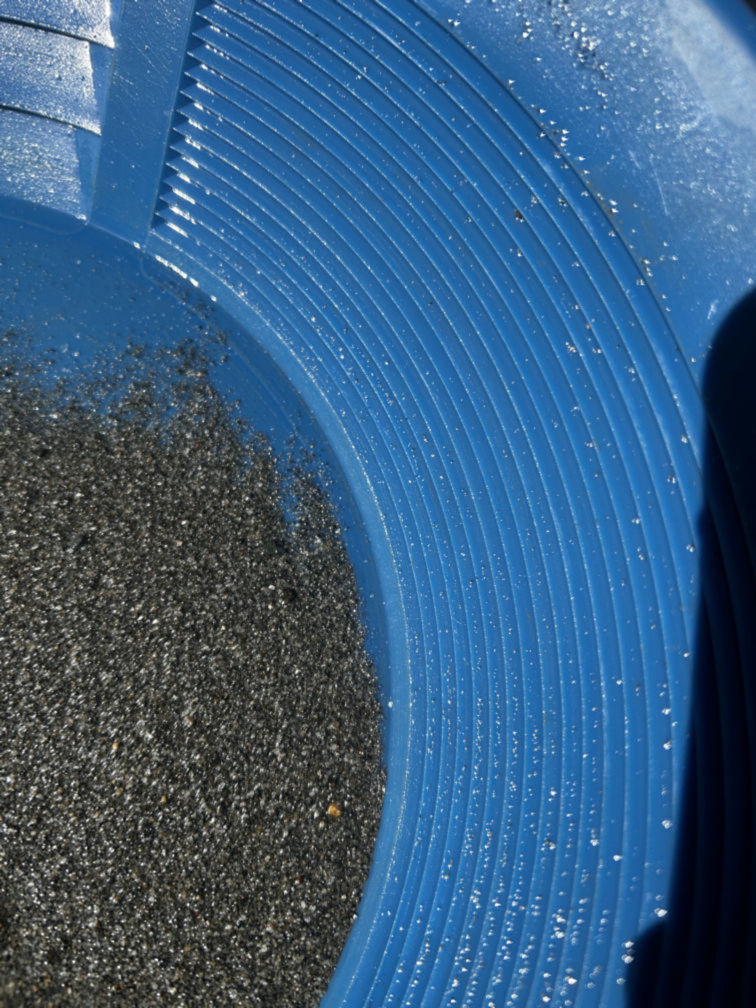
But I did manage to spot a couple of flecks of possible gold during quick glances in the pan.
I removed those and put them into a vial for storage.
I am still using careful wording here. They are possible gold flecks. They looked interesting enough to keep, and they behaved well enough in the pan for me to take them seriously, but I am not pretending they are confirmed until I can inspect them more carefully.
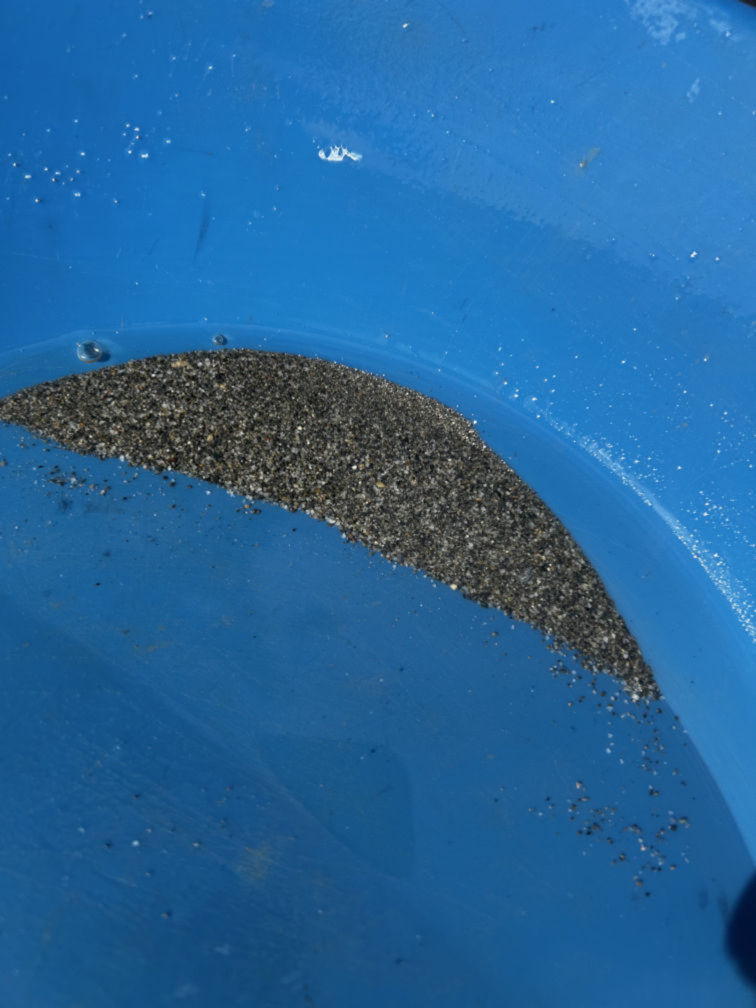
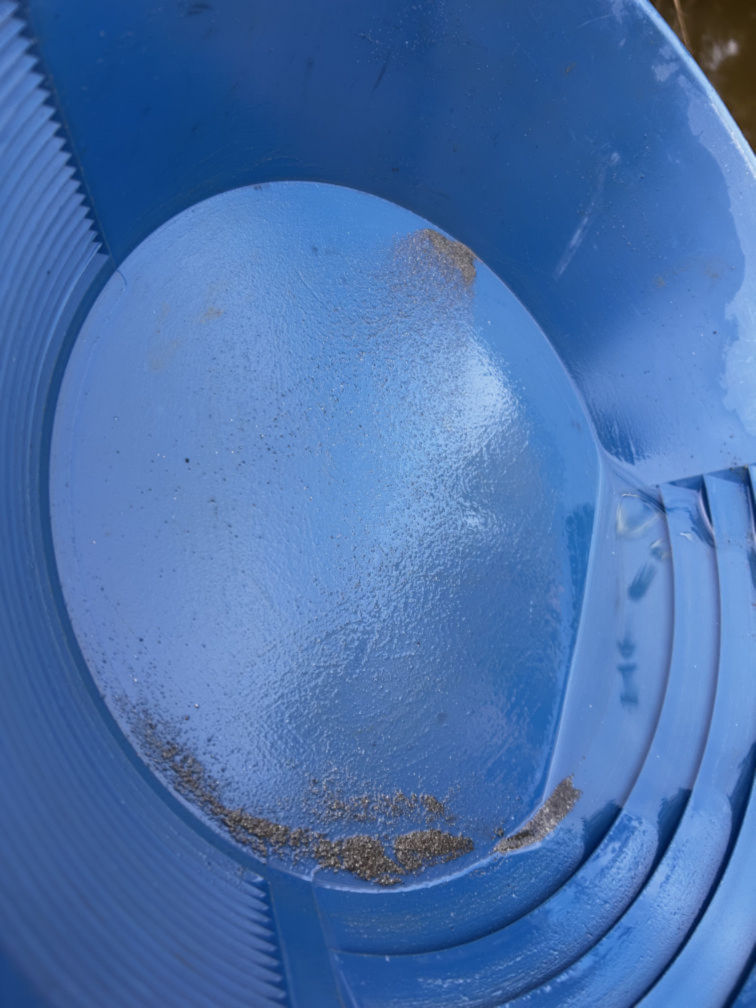
After checking each pan, I worked the material down a little further and then put the remaining concentrates into a bucket to finish properly at home.
I did not end up with a huge amount of concentrates, but that may actually be a good thing.
A smaller amount of better-context material is probably more useful than a large bucket of mixed mystery dirt.
Waiting for Better Light
The concentrates from Site 4 still need to be worked properly at home.
I am not rushing that part.
One thing I have learned recently is how much light matters when trying to spot tiny colour. Sunlight, cloud, glare, shade, and water angle can all change how easy or difficult the pan is to read.
At this stage, I am still training my eyes.
So I want to go through the remaining concentrates when I have good daylight and sunshine.
If there is anything small hiding in there, I want to give myself the best chance of seeing it.
Mica-Heavy Pans
During the day, I also hit a patch of mica-heavy pans.
This is becoming a familiar kind of frustration.
Mica is very good at pretending to be exciting. It flashes, shines, moves around, and catches the eye just enough to slow me down.
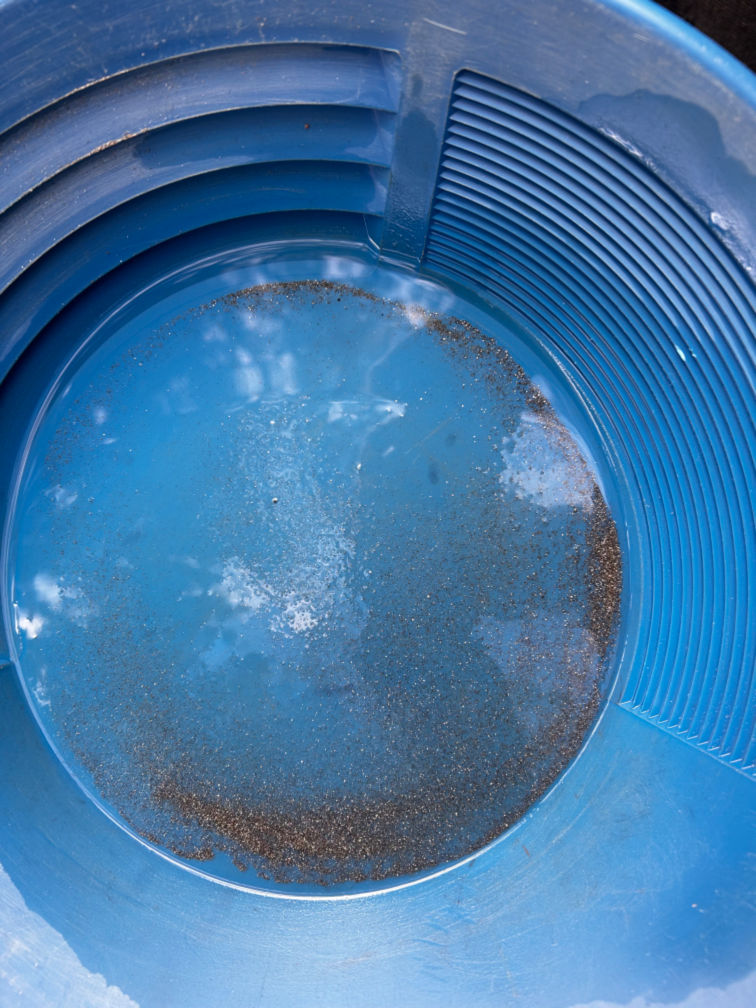
After my recent tailings experiment at home, I paid more attention to the mica than I probably would have earlier in this journey. I tried to remove what I could before putting the remaining concentrates into the collection bucket.
It is still annoying, but it is also useful practice.
The more mica I deal with, the better I should become at ignoring shiny distractions and focusing on material that behaves more like gold.
That is the theory, anyway.
Heavy Rocks and Quartz Veins
While classifying the material down, I started paying more attention to the rocks being left behind.
A few pieces stood out because they felt heavier than I expected for their size.
I am not sure yet whether that is simply due to the natural composition of the rocks, or whether they may be hiding something more interesting.
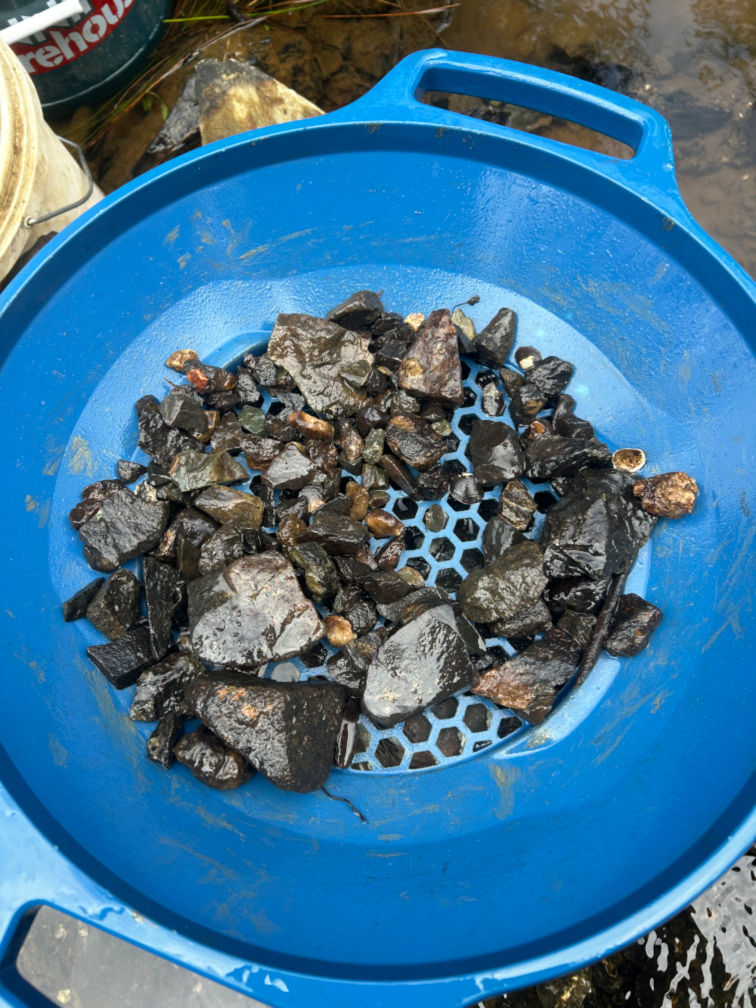
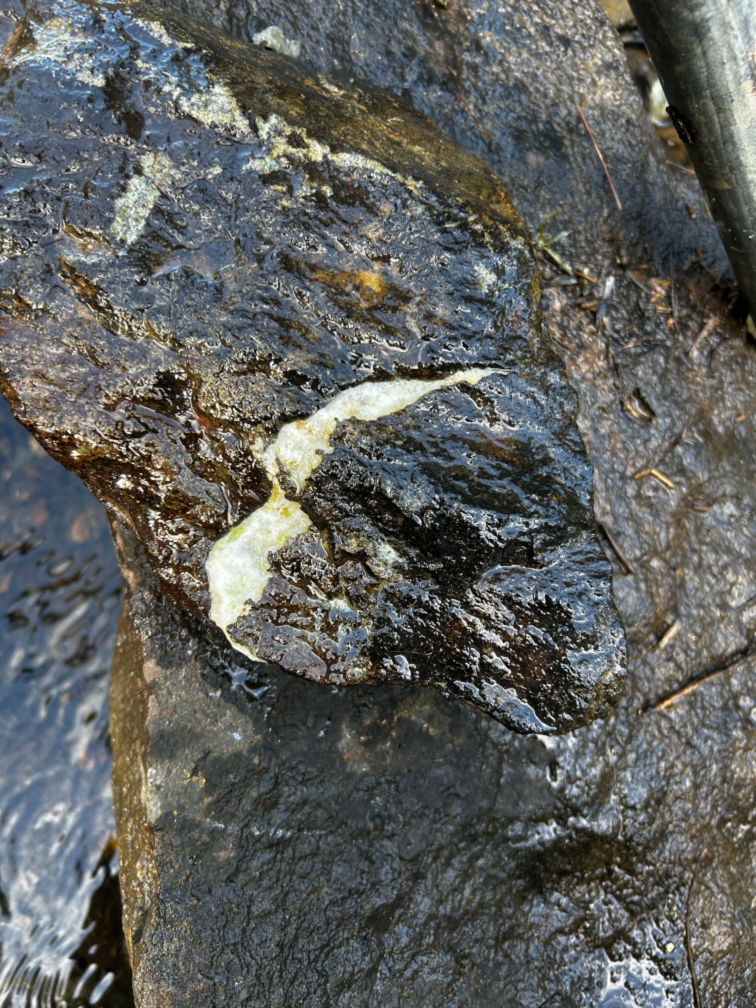
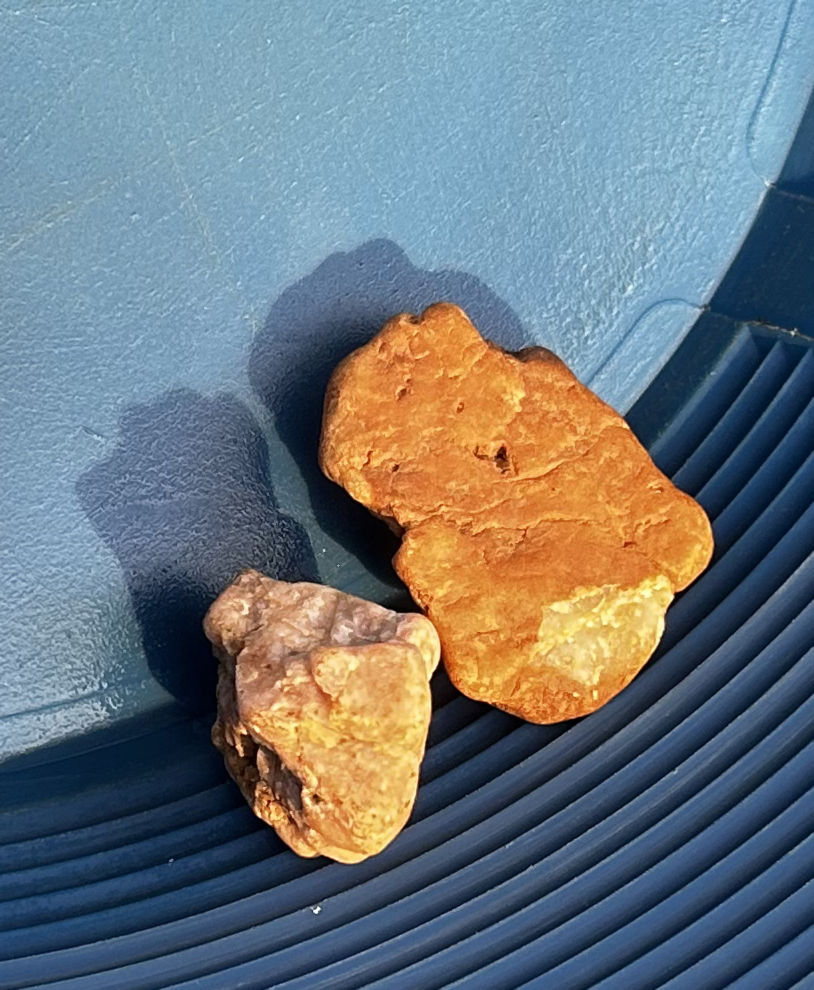
Most of the pieces I kept were quartz, or rocks with quartz veins running through them.
I am not treating them as proof of gold.
Quartz on its own does not mean gold is present, and I am trying not to get carried away just because a rock looks interesting. But these pieces were different enough from the usual material that I decided to bring them home for closer inspection.
At this stage, they are simply “interesting rocks”.
I may inspect them more carefully, compare their weight and appearance, and possibly crush a small amount later if they seem worth testing further.
If I do decide to crush any quartz or veined material, I will need to do it carefully. Quartz dust is not something I want to breathe in, and crushing rock is not something I want to treat casually.
For now, the rocks are being kept aside for later analysis.
They may turn out to be nothing.
But they were unusual enough to earn a place in the sample pile.
Possible Mercury Balls
As I worked through the pans, I was also quick to isolate any potential mercury balls.
These went into the dedicated storage bottle I now use only for that kind of suspicious material.
I am still treating these as suspected mercury or unknown silver material, not confirmed mercury. But I am also not going to play around with them.
The storage bottle is now separate from my normal fossicking gear. It will not be used for anything else.
I am not heating the material.
I am not crushing it.
I am not smelting it.
I am not acid-cleaning it.
I am not casually testing it.
Old gold areas can contain unexpected material, and the more I do this, the more careful I want to be with anything unknown.
It is very easy to get excited about shiny things when fossicking.
Sometimes the shiny thing is exactly what needs to be left alone and treated with caution.
The New Detector Started Well
The new detector started out fairly well.
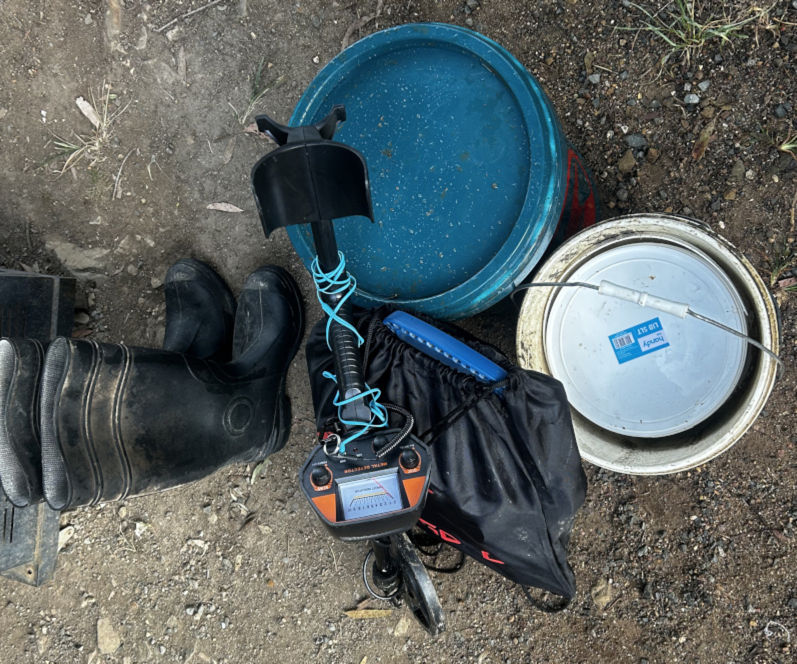
It felt better than my previous cheap one, and I quickly learned that it gives different tones for different potential metals.
The low tone seemed to line up with scrap iron.
I found a couple of bits of scrap iron during the day, and those appeared to match that lower tone.
The high-pitched tones were more interesting.
Whenever I got a high tone, I naturally focused on that area more carefully. I still do not fully trust the detector, and I am still learning how to interpret what it is telling me, but the tone differences were useful.
At least, they were useful while the detector was behaving.
I Think I Killed the Detector
Unfortunately, I may have killed the new detector on its first proper outing.
I only had the coil section underwater, but after that it started giving false readings on a regular basis.
That makes me think the coil may not actually be waterproof, or at least not as waterproof as I assumed.
So the detector may have gone from promising new tool to unreliable noise machine in one day.
That is disappointing, but also very on-brand for a cheap detector.
It did find some scrap iron.
It did teach me a little bit about the tone system.
It did help me focus on a few spots.
But if it keeps giving false signals, it may become more of a distraction than a tool.
That seems to be a recurring theme with my metal detectors.
The Turbo Pan Arrived
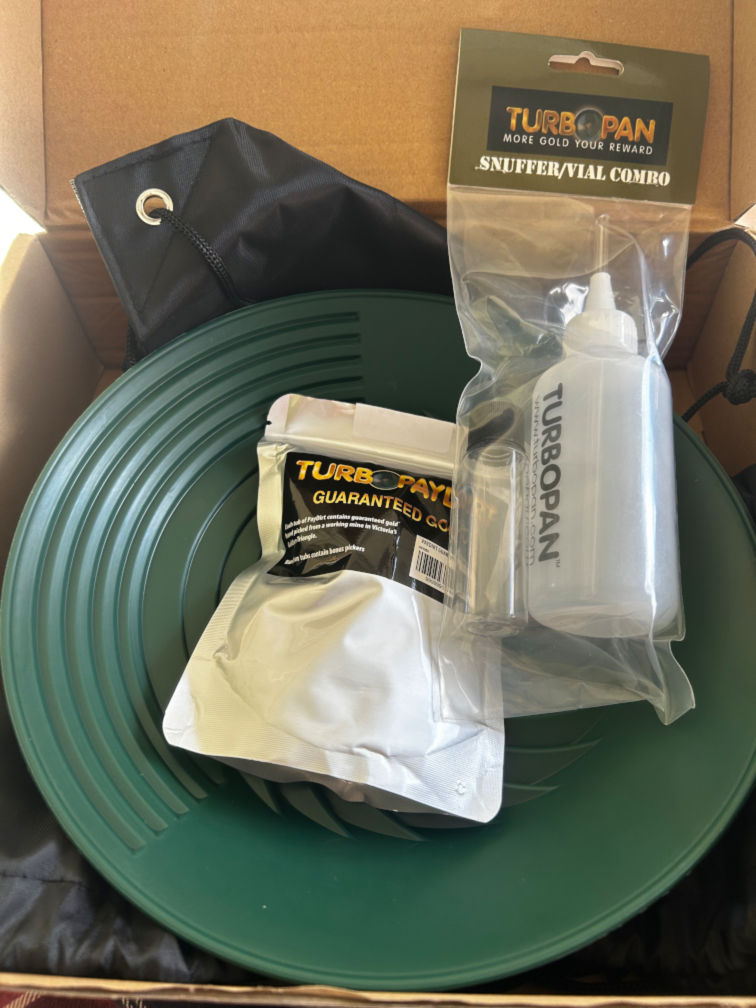
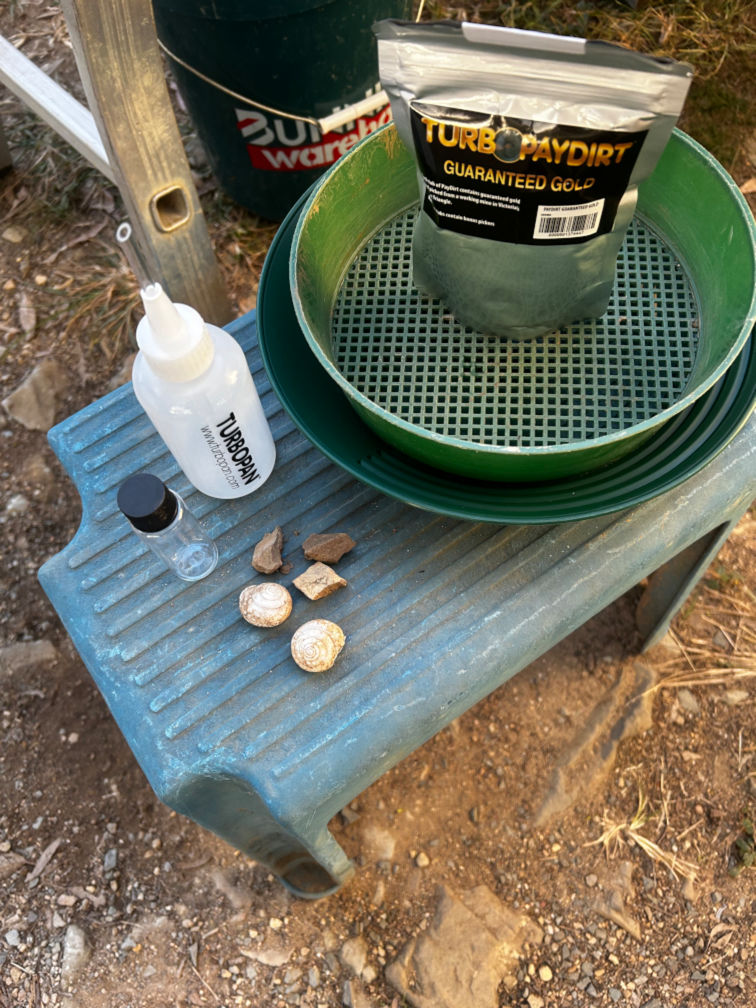
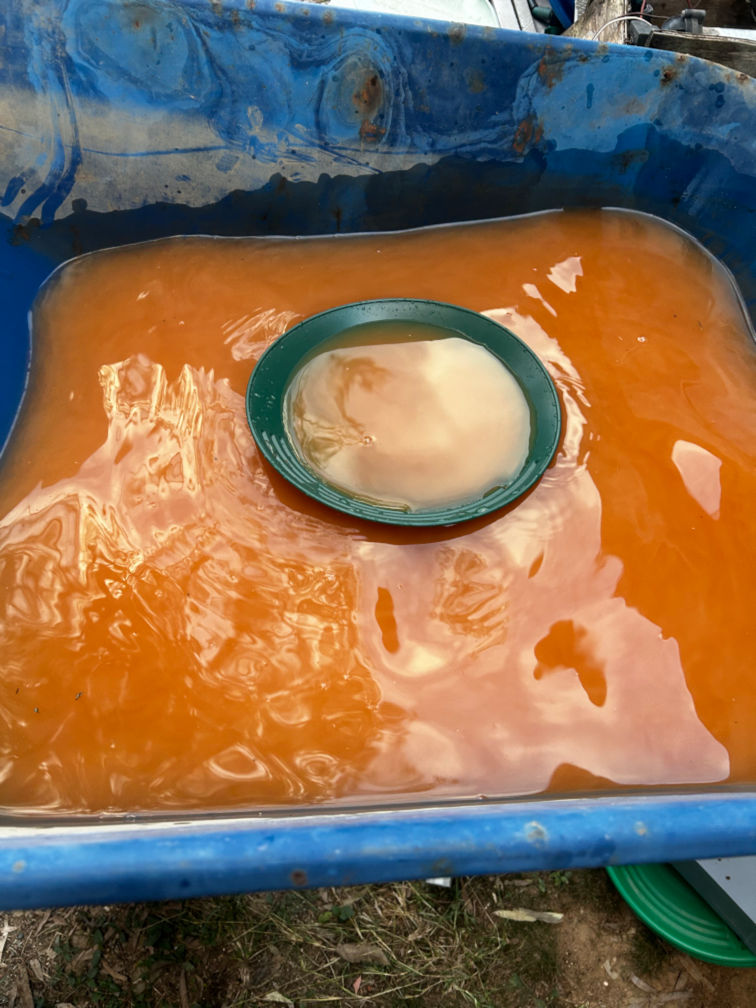
On a separate but related note, my new turbo pan arrived the same day.
I went all out and got a kit that included some paydirt as well.
Naturally, I had to try it.
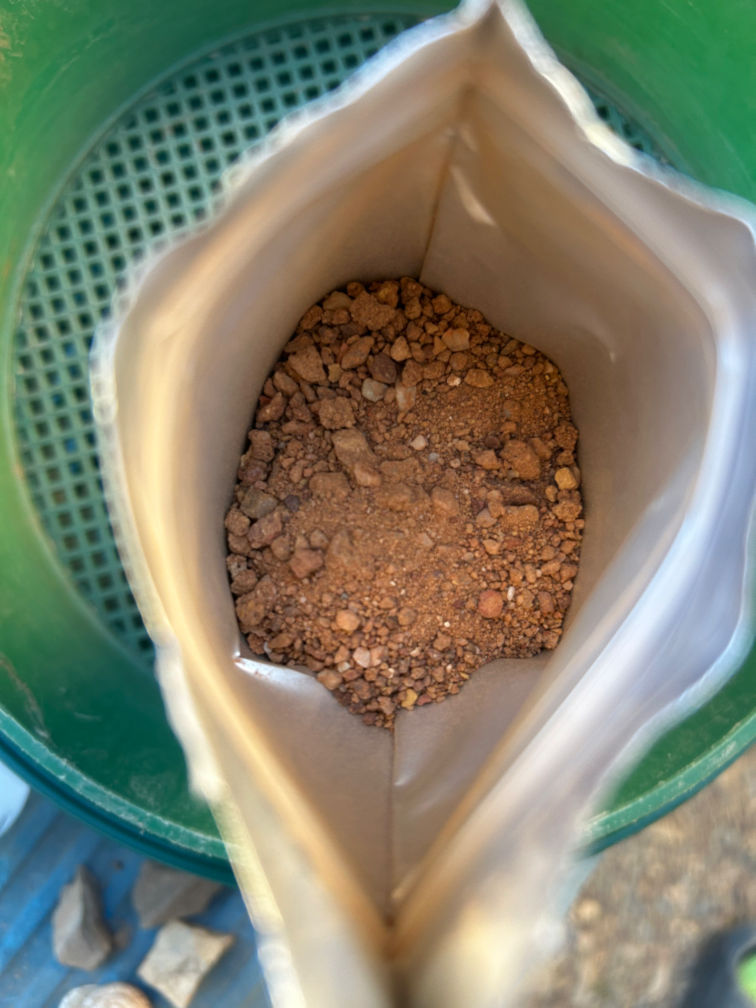
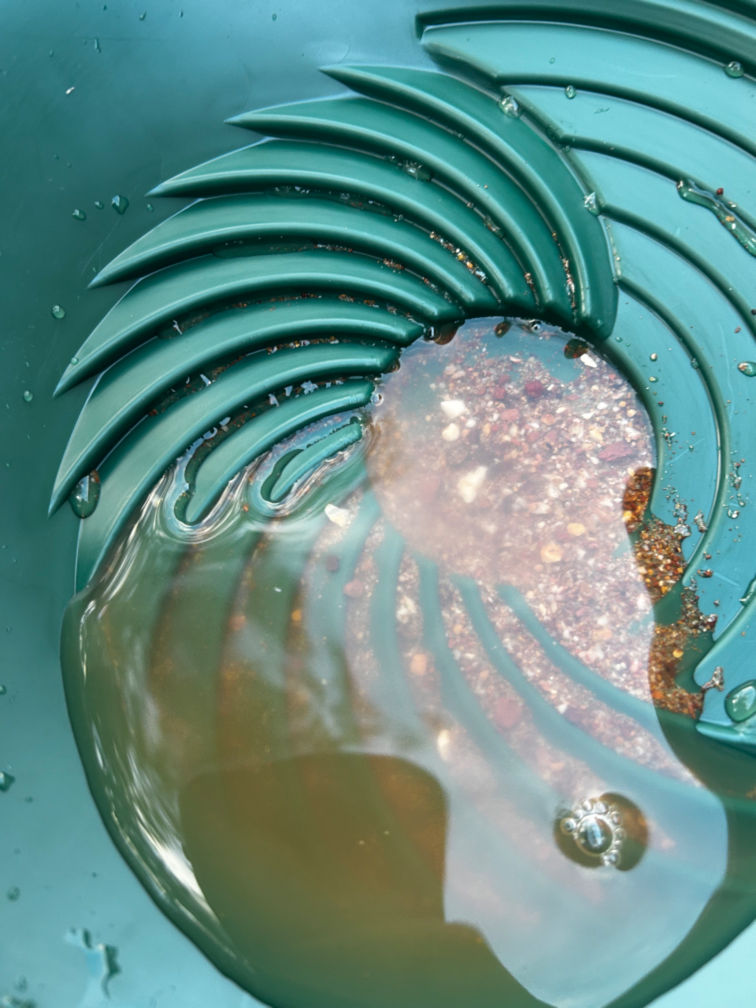
The paydirt was very different from the material I have been working locally. It had a noticeable red/orange colour throughout it, which is not something I have really worked with before.
That alone made it useful practice.
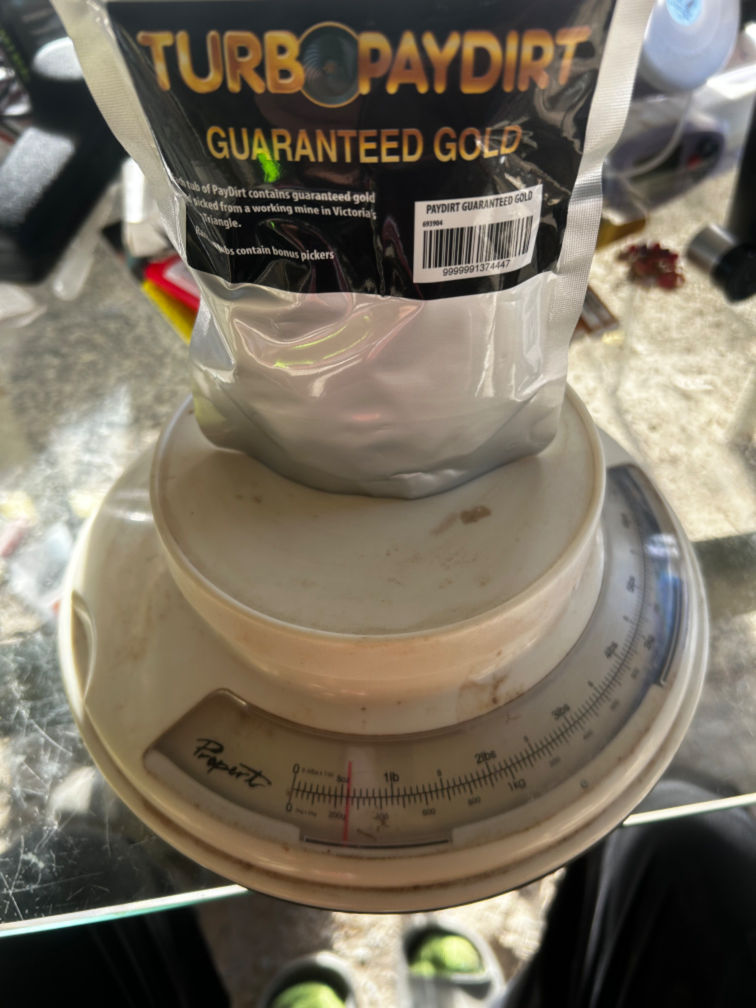
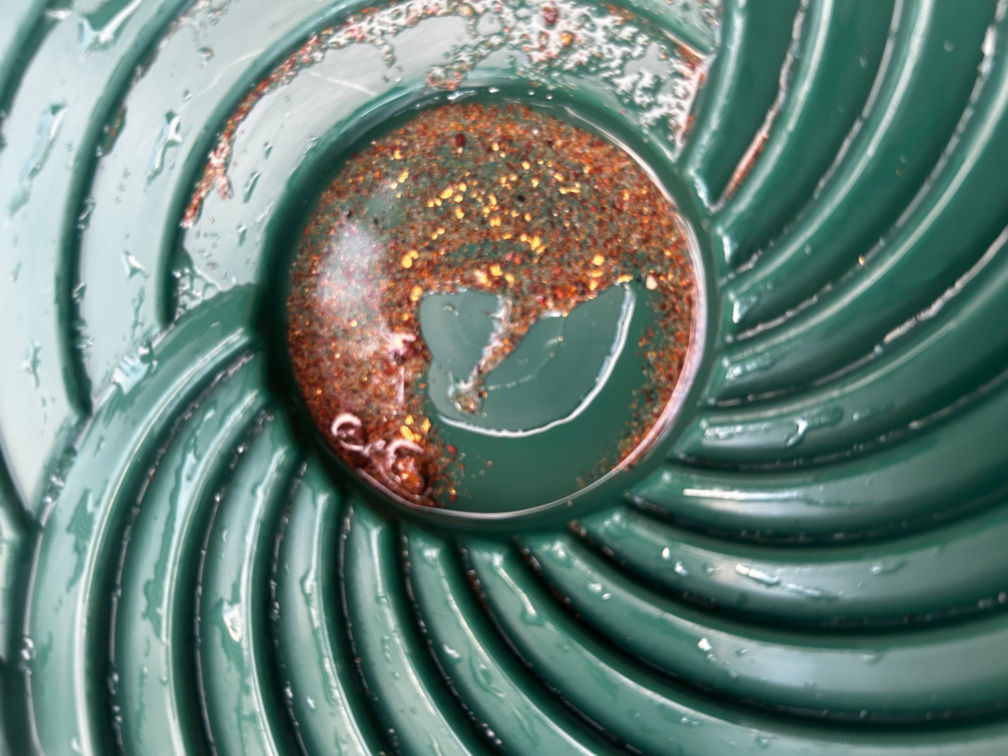
The kit apparently had a minimum of 0.1 grams of gold.
I recovered 0.08 grams.
That means I almost certainly left some behind.
So, just like my field concentrates, the used paydirt material will need to be re-panned so I can see what I missed.
Floating Gold and a Lesson Learned
One thing I noticed too late while panning the paydirt was that some of the gold was floating.
That was a good lesson.
I should have used the detergent agent from the beginning instead of waiting until I noticed the floating gold.
By the time I realised what was happening, I may have already made the recovery harder than it needed to be.
That is exactly why paydirt practice is useful.
It gives me a known target. If there is supposed to be at least 0.1 grams in the material and I only recover 0.08 grams, then I know my technique still needs work.
That is not a failure.
That is feedback.
And feedback is useful.
What I Learned From This Trip
This trip did not go exactly how I planned, but it probably gave me a better plan for future trips.
The main lessons were:
One proper site is probably enough for one fossicking day.
Scouting and sampling are not the same thing.
If an area is outside the designated fossicking area, it stays as observation only.
Old holes and rough ground are real safety hazards.
Site 4 deserves more time.
Creek features need to be observed more carefully.
Deep-to-shallow-to-deep water changes may be worth testing further.
Possible colour should be removed and stored carefully.
Smaller, well-contexted concentrates are better than random mixed material.
Mica-heavy material is annoying but useful practice.
Interesting quartz and heavy rocks are worth setting aside, but not overhyping.
Suspected mercury or unknown silver material needs immediate separation.
Cheap detectors may not survive creek work.
Paydirt can expose weaknesses in panning technique.
Floating gold is something I need to prevent earlier.
That is a lot from one day.
Not a lot of gold, maybe.
But a lot of learning.
What I Will Do Differently Next Time
The next fossicking trip will probably be simpler.
One main site.
More time.
Less rushing.
Better focus.
If I go back to Site 4, I want to spend more time around the creek feature I noticed – the deeper water, shallow gravel bar, and drop-off into deeper water again.
I also want to be more deliberate with sample labelling, especially if I test multiple settings within the same site.
Instead of thinking in terms of locations only, I need to start thinking in terms of sample types:
Gravel bar material
Deeper water edge
Drop-off material
Mica-heavy material
Clay or heavy layer
Material behind rocks
Concentrates from a specific section
That would make the home analysis much more useful.
I also need to decide whether the metal detector is worth bringing every time.
If it is giving false readings, it may not be. But if it can reliably help me identify scrap iron, high-tone targets, or areas worth checking, then it may still have some value.
For now, the detector is on probation.
Final Thoughts
This trip started with three targets and ended with one main lesson:
Slow down and work one site properly.
The Never Mind scout reminded me to respect boundaries and watch my step.
The heatmap target became a future family fossicking area.
Site 4 became the real focus of the day.
That is where I found a couple of possible flecks of colour, collected concentrates for better daylight testing, noticed useful creek features, isolated more suspicious silver material, and brought home a few interesting quartz and veined rocks to inspect further.
The detector may or may not have survived.
The turbo pan reminded me that even known paydirt can still beat my technique.
And Site 4 gave me enough reason to return.
No dream nugget yet.
No confirmed rich patch.
No dramatic vial full of gold.
But there were possible flecks, better observations, and another useful step in learning gold the hard way.
For now, that counts.
Part of the Gold Experiment Series
This post is part of my ongoing gold fossicking and smelting experiment series:
I did not head out to any new fossicking sites for this experiment.
This time, the learning happened at home.
Instead of collecting fresh material from the field, I went back through some of my own waste material from previous fossicking and panning sessions. I think “tailings” is the correct term, although in my case that sounds much more impressive than it really is.
My tailings pond is an old plastic children’s swimming pool.
So, not exactly a professional mining setup.
But it gave me a good mix of leftover material to experiment with, and that turned out to be far more useful than I expected.
This was not a day of big gold finds. There were no spectacular flakes sitting in the bottom of the pan, no dream nugget, and nothing that made me think I had suddenly cracked the code.
But I did get a better feel for how different materials behave in the pan. Of how different quantities of material behave in the pan. And probably more importantly – how my techniques, or lack thereof, make the pan behave.
I also found more suspicious silver-looking material that I am now treating very carefully.
So while it was not a dramatic gold day, it was still a useful learning day.
Why I Went Back Through the Tailings
After my earlier fossicking trips and first smelting attempt, one thing has become very clear:
I still need to get better at the material handling stage.
Finding ground is one thing.
Collecting material is another.
But actually understanding what is in the pan, how different material moves, what should be discarded, and what deserves a second look is a skill of its own.
That is why I decided to go back through some of my waste material.
At first, that might sound pointless. After all, if I had already panned it once, surely anything useful should have been removed already.
But I am still learning.
That means my “waste” may not be as empty as I think it is. It may also contain useful lessons, even if it does not contain much gold.
This session was about testing technique more than chasing results.
I wanted to see what I may have missed, how different sample types behaved, and whether I could improve my ability to spot colour under less-than-perfect conditions.
The Tailings Pond Setup
My tailings pond is extremely simple.
It is just an old children’s swimming pool that has been used to hold waste material, wash water, sludges, and leftovers from previous panning sessions.
There is nothing fancy about it.
But for this kind of learning, that was actually useful.
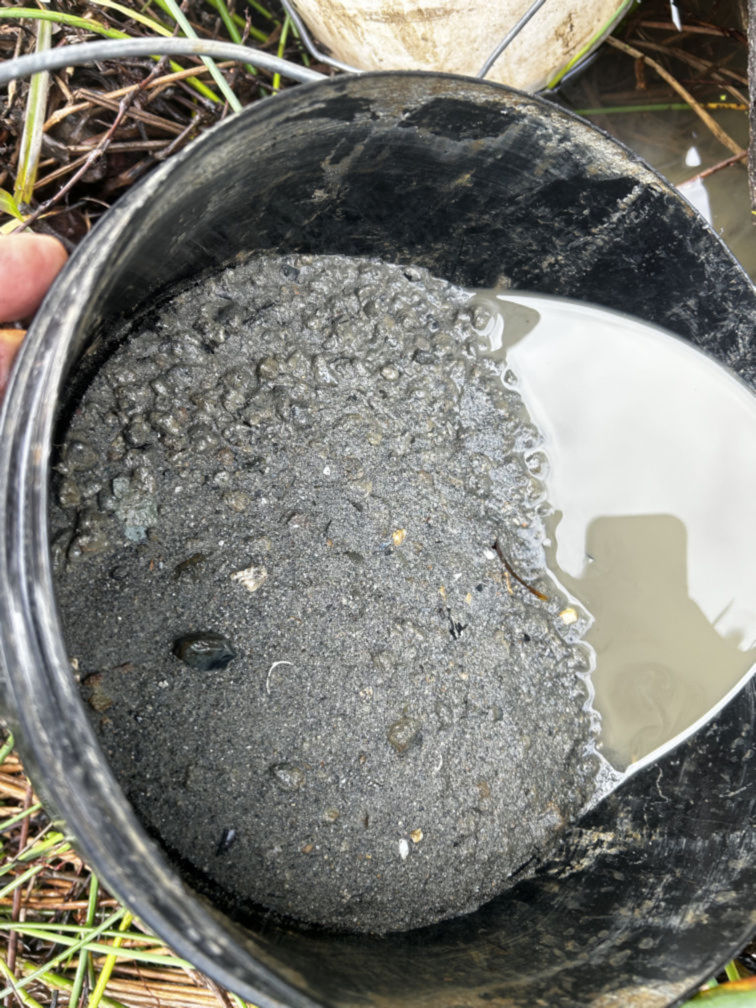
Because the pool had collected different types of material over time, I had a variety of samples to play with. Some were sandy. Some were heavy with mica. Some were clay-rich. Some were sludge from the bottom of the pool.
It gave me a chance to test different panning approaches without needing to leave home.
That made the day less about finding a new gold-bearing site, and more about improving the basics.
The Sample Types I Worked With
One of the most useful parts of the day was the range of material I had available.
I was not just re-panning one simple bucket of gravel. I had several different sample types, and each one behaved differently.
That made the session more educational than I expected.
High Mica Material
Some of the material had a high mica content.
This is frustrating stuff when you are still learning to spot gold.
Mica can look bright, shiny, and exciting for about half a second. Then it moves differently, flashes differently, and reminds you that not every shiny thing deserves attention.
This kind of material is useful practice because it forces me to slow down and pay attention to how the particles behave in the pan.
Gold should be heavy.
It should not float around like a lightweight shiny distraction.
Mica, on the other hand, can be very good at pretending to be interesting.
Working with the mica-heavy samples helped me practice ignoring some of the false signals and focusing more on behaviour rather than shine alone.
Clay Samples
The clay-rich material was a different kind of challenge.
Clay does not like to make things easy.
It can hold together, cloud the water, hide fine material, and make it harder to see what is actually happening in the pan.
With these samples, I had to spend more time breaking the material down properly before trying to pan it out.
That was a useful reminder.
If clay is not broken down well enough, then it may trap small heavy particles and carry them through the process in ways I do not properly understand yet.
For a beginner, that matters.
It means the gold may not always be lost because the ground was bad. It could be lost because the material was not worked properly.
That is exactly the kind of lesson I need to learn now, before I become too confident in my own results.
Sludge From the Tailings Pool
The sludges from the bottom of the tailings pool were probably the least glamorous samples of the day.
They were messy, slow, and not especially pleasant to work with.
But they were useful.
Fine material can settle in strange ways, especially when everything has been washed, moved, stirred, and left to sit. I wanted to see whether anything heavy had collected in the bottom sludge and whether it behaved differently from the more obvious gravel or sand samples.
This was not exciting panning.
It was not the kind of thing that looks good in a photo.
But it did force me to work slowly and pay attention.
That alone made it worthwhile.
The Light Made Everything Harder
Another major part of the day was the changing light.
I had sunlight, cloud, misty rain, and glare all coming and going while I was trying to check samples.
That made a much bigger difference than I expected.
When the sun was clear and hitting the pan nicely, I felt like I had a much better chance of spotting colour. Tiny flecks are hard enough to see at the best of times, but good light at least gives me a fighting chance.
When the cloud came over, things became harder.
When misty rain started, it became more annoying.
When glare hit the water at the wrong angle, the surface of the pan became difficult to read.
This is something I had not fully appreciated before. Spotting small gold is not just about having gold in the pan. It is also about having the right light, the right angle, and enough patience to check properly.
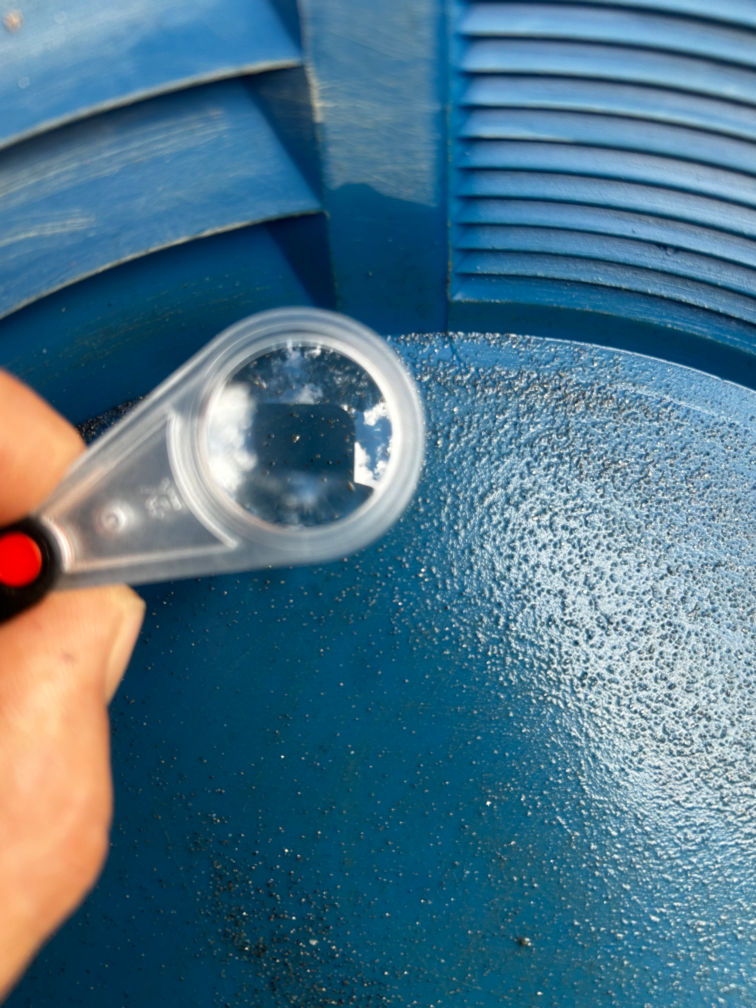
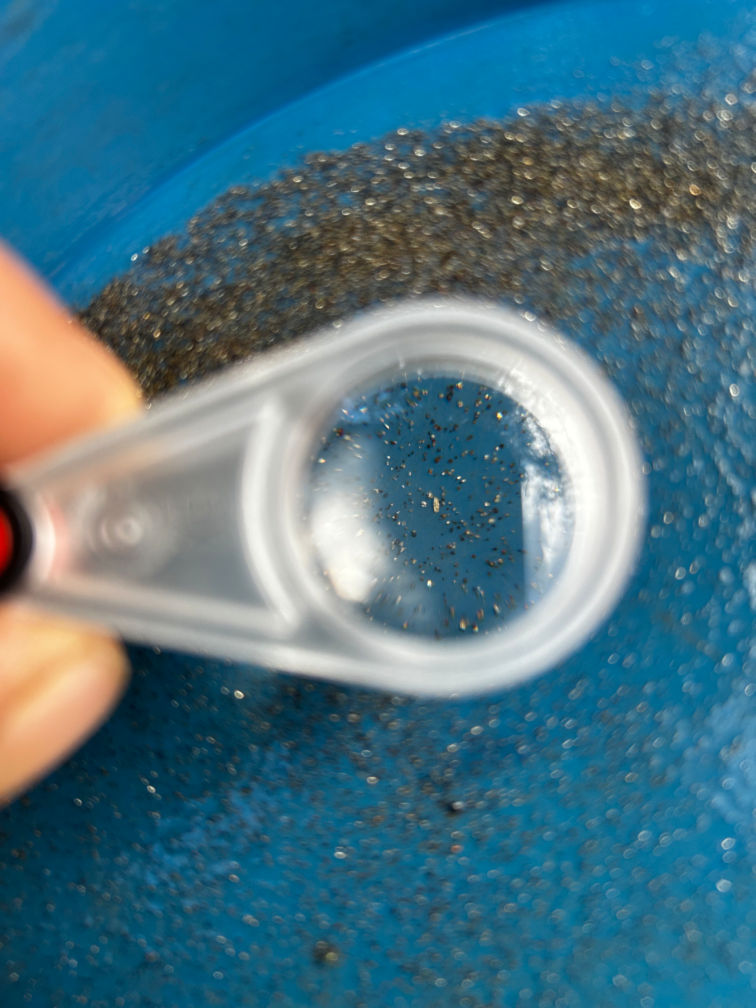
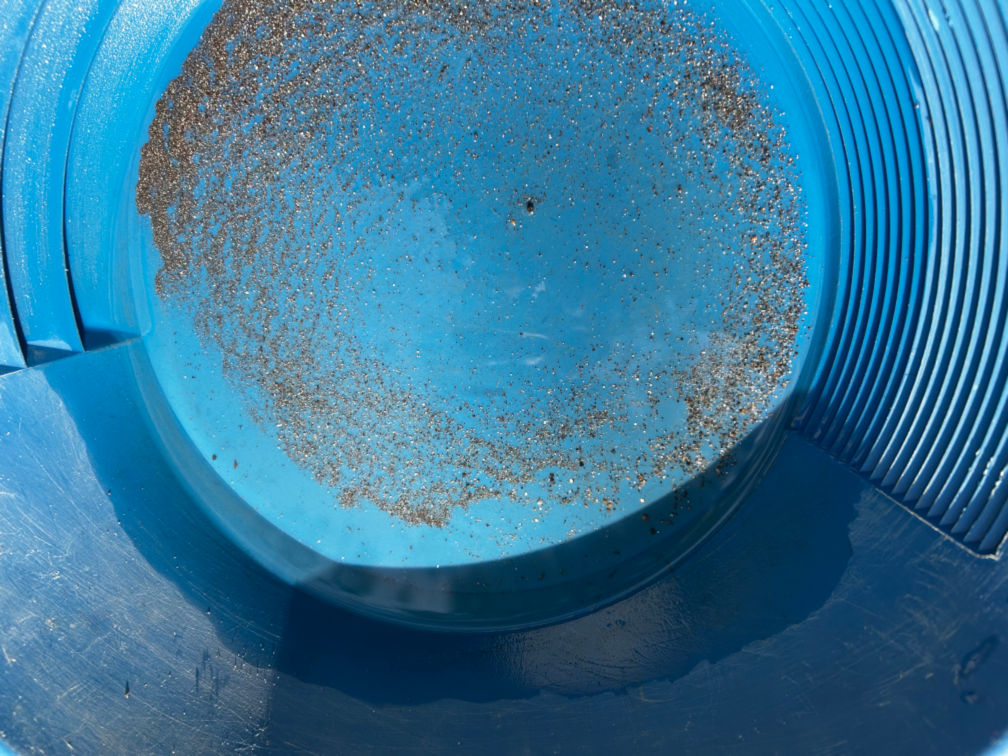
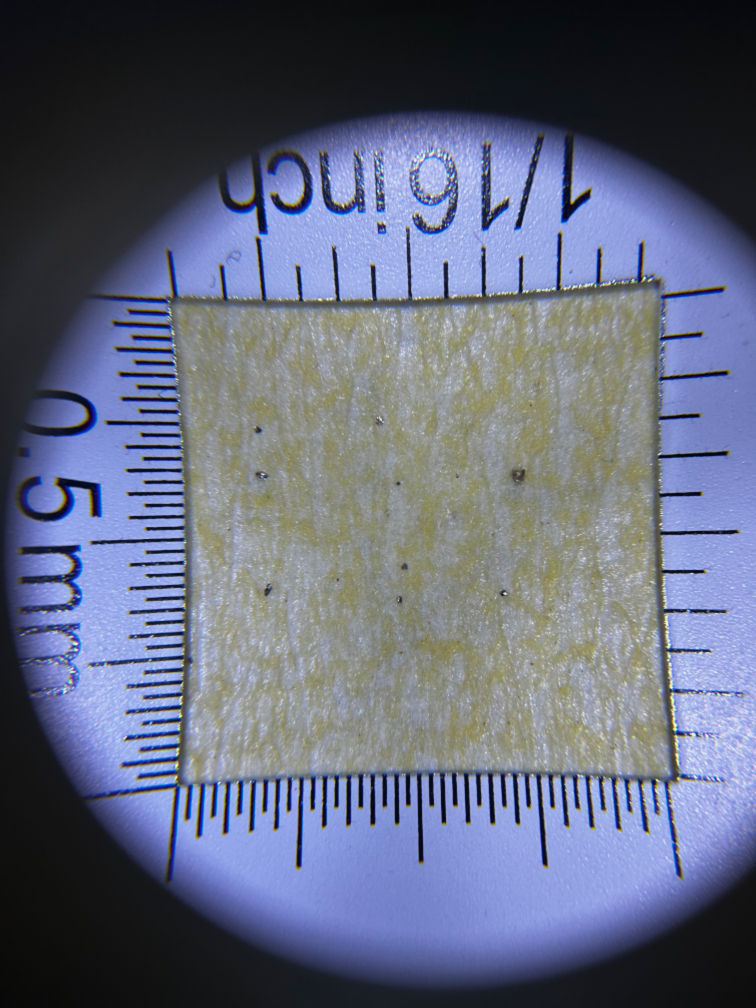
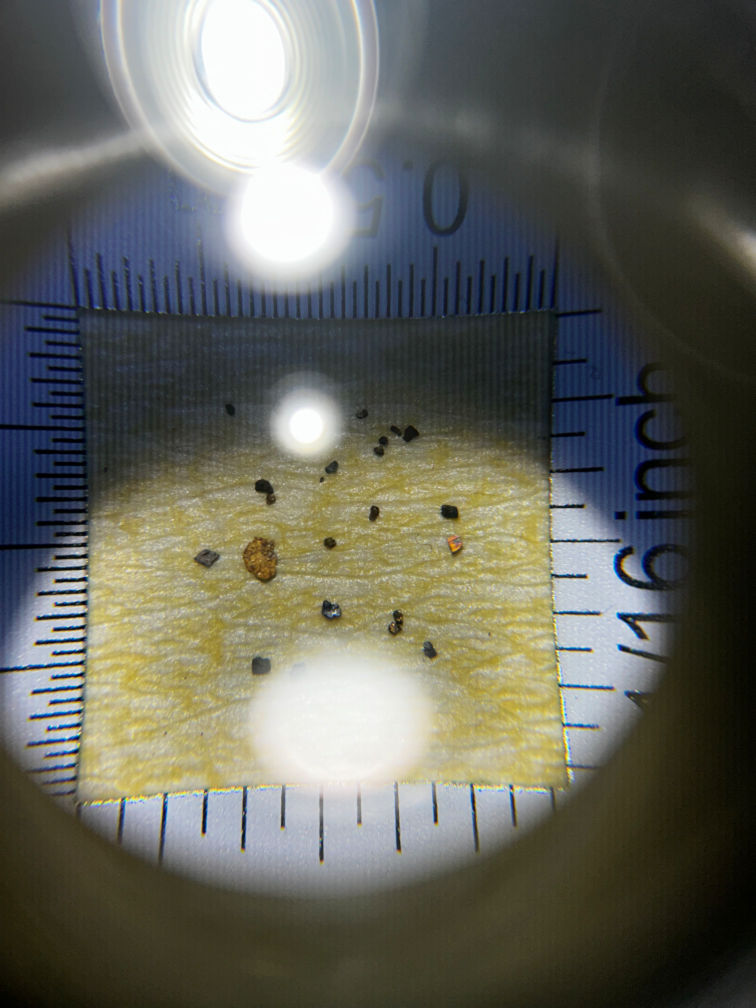
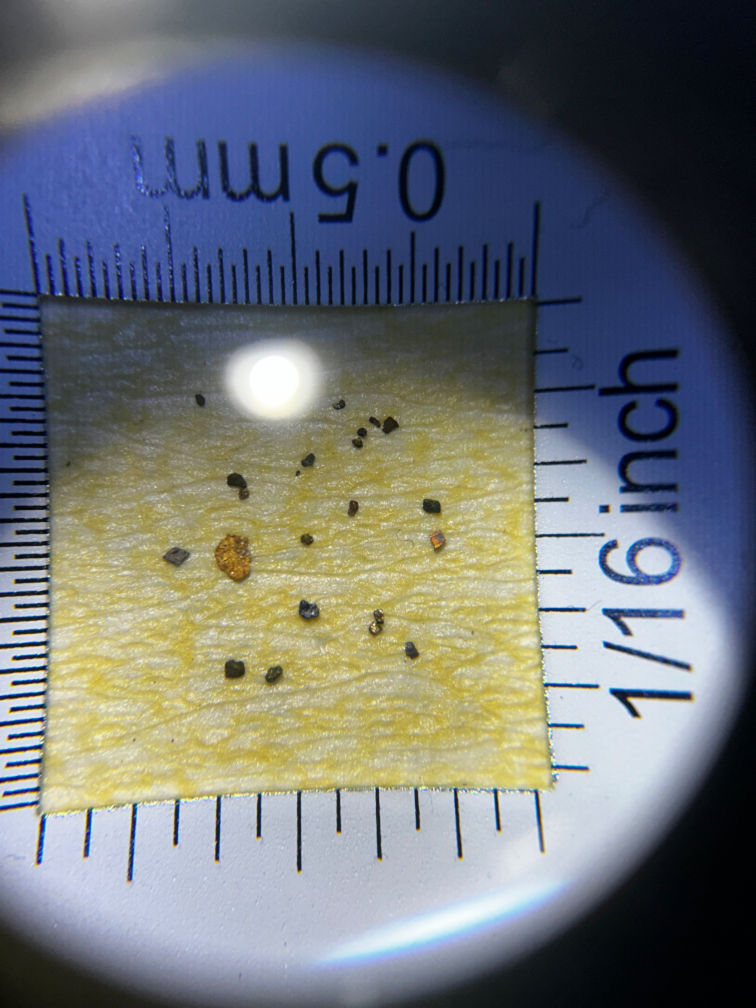
At this stage, I am still training my eyes. I wear reading glasses and also have a 3x and 5x magnification loupe handy. I am able to overlay both lenses of the loupe simultaneously, which I assume provides me with 15x magnification.
I am still learning what colour looks like when the sun is good, let alone when conditions are changing every few minutes.
So the light was not just a background detail. It became part of the experiment.
Experimenting With Panning Technique
Because I was working at home, I had more freedom to experiment.
I was not rushing between sites or trying to beat the weather in the field. I could re-run material, slow down, try different approaches, and see what happened.
Some of the things I paid more attention to included:
How aggressively I washed lighter material away
How slowly I worked near the final concentrates
How mica behaved compared with heavier material
How clay needed to be broken down before panning properly
How much fine material remained in the pan
How different lighting changed what I could see
Whether the “waste” still held anything worth noticing
Panning with different angles and force
This kind of practice is not dramatic, but it is important.
The better I get at panning, the less likely I am to throw away something useful.
That is the theory, anyway.
No Spectacular Gold Finds
I did not find any spectacular pieces of assumed gold during this session.
There were no big flakes.
No obvious chunky pieces.
No exciting moment where something bright and heavy sat there waiting to be snuffered up.
That was a little disappointing, but not surprising.
This was waste material from previous work, and I was mainly using it to practice and test technique.
Still, I was hoping I might find something obvious that I had missed the first time.
That did not really happen.
But I did find something else.
And it was not something I wanted to treat casually.
Suspicious Silver Material
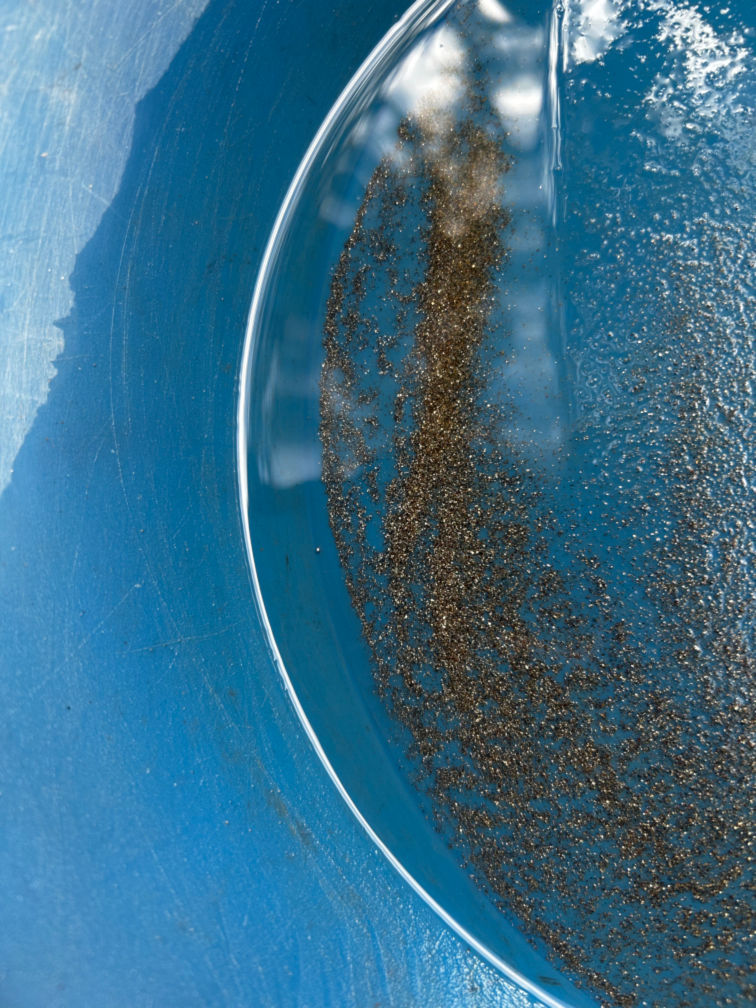
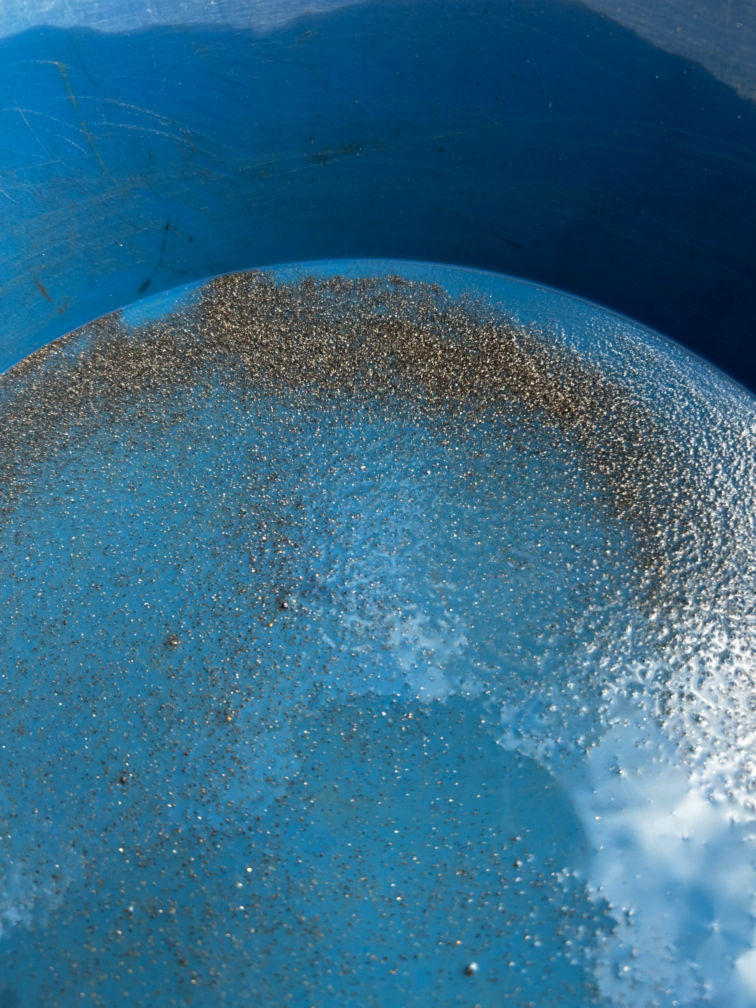
During the session, I found a small amount of silver-looking material.
Some of the pieces appeared flexible and had a bright silver appearance.
I am not claiming with certainty that this is mercury amalgam.
But it looked unusual enough that I treated it with caution.
I have come across similar suspicious silver-looking balls before while working material from old gold areas. Because of that, I am now treating this material as unknown and potentially hazardous until it can be properly identified.
As a precaution, I placed the pieces into a vial with water and sealed it with a lid.
I am not going to heat it.
I am not going to crush it.
I am not going to smelt it.
I am not going to casually test it with acid.
It is being kept separate and treated as suspicious material.
Panning a Single Suspected Mercury Ball
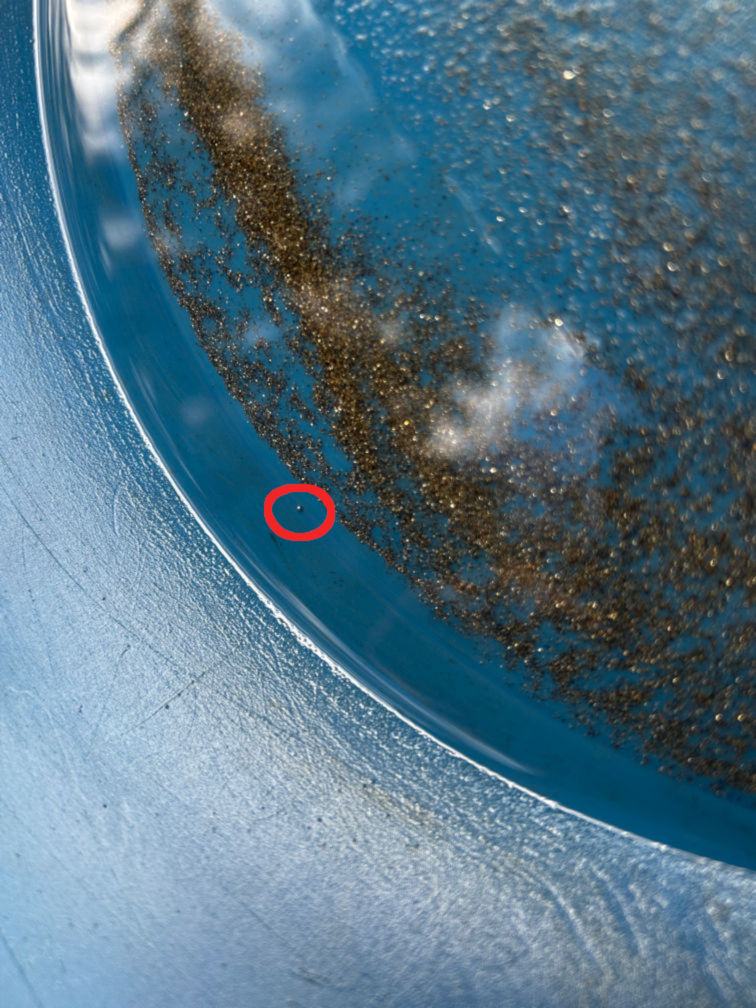
One particular piece stood out as a single ball of suspected mercury.
I carefully panned it, then transferred it into a snuffer bottle with the other collected silver-looking balls.
That snuffer bottle is now dedicated to this material only.
It will not be used for anything else.
At least not unless the material is professionally identified and dealt with safely.
From this point on, I consider that snuffer bottle contaminated or potentially contaminated. It is no longer part of my normal fossicking kit.
It will stay sealed, labelled, and separate.
That may sound overly cautious, but I would rather treat unknown material with respect than make a dangerous assumption because it looks interesting.
Why I Am Not Trying to “Clean It Up” at Home
My first thought was that perhaps I could clean this material up later when my nitric acid order arrives.
After thinking about it more carefully, I am not going to treat it that way.
Unknown silver-looking material from old goldfield samples is not something I should be experimenting with casually.
If it is mercury or amalgam, then acid, heat, crushing, or smelting could create risks that are not worth taking in a backyard learning setup.
I have also read that sulfur can help reduce mercury vapour and that clean copper can interact with mercury. There may be some truth to both of those ideas, but I am not treating either one as a home solution.
Adding sulfur or copper does not magically make the material safe.
It may simply create mercury-contaminated waste that still needs to be handled properly.
For now, the safest approach is containment, labelling, separation, and not opening or processing it unless I have proper advice.
The current rule is simple:
Do not heat it, acid-clean it, smelt it, crush it, or play around with it.
That is the rule I am going with.
How I Am Storing the Suspicious Material
For now, the suspicious silver-looking material is being kept in sealed containers with water.
The dedicated snuffer bottle will not be reused for anything else.
I will keep it:
Sealed
Clearly labelled
Stored upright
Kept away from heat
Kept away from living areas
Kept away from children and pets
Stored inside secondary containment
Separate from normal fossicking tools
I do not want this mixed back into my general gear by accident.
I also do not want to forget what it is later and treat it like an ordinary gold sample.
That is why labelling matters.
Future me cannot be trusted to remember every little thing from today, so future me gets a label.
The Bigger Lesson About Old Goldfield Material
This was a useful reminder that old goldfield areas can contain more than just gravel, black sand, quartz, and possible gold.
They can also contain rubbish, metal scraps, lead, rusted objects, broken glass, and possibly residues from older recovery methods.
That does not mean every shiny silver ball is definitely mercury.
But it does mean I should not assume unknown material is harmless.
The more I do this, the more I realise fossicking is not just about asking:
“Is that gold?”
Sometimes the better question is:
“What is that, and should I be touching it?”
That is a very different mindset.
And probably a safer one.
What I Learned From Re-Panning My Tailings
This session taught me more than I expected.
The biggest lesson is that waste material is not necessarily wasted learning.
Even if there is no visible gold left in it, tailings can still teach technique.
From this session, I learned:
High mica samples are excellent practice for ignoring shiny distractions
Clay needs patience and proper breakdown
Sludge is messy but useful for understanding fine material
Changing light can make spotting colour much harder
Glare can make the pan difficult to read
Re-running material can reveal weaknesses in technique
Unknown silver material should be treated cautiously
A dedicated container is essential for suspicious finds
Not every learning day needs a new fossicking site
That last point is important.
I did not need to leave home to make progress.
I just needed to go back through material I already had and pay closer attention.
Was It Worth Re-Panning the Waste?
Yes.
Not because I found a nice gold flake.
I did not.
It was worth it because I learned more about the material I am working with when I am in the field.
I learned more about how I pan.
I learned more about what distracts me.
I learned more about how much the light affects what I can see.
And I learned that I need to be careful with suspicious silver-looking material from old gold areas.
That is enough to call the session useful.
This whole project is about learning gold the hard way.
Sometimes that means going out into the field.
Sometimes it means standing at home beside a children’s swimming pool full of tailings, mucking around with sludge in changing weather, and realising that the waste still has something to teach.
What I Will Do Differently Next Time
Next time I re-pan tailings or work through old sample material, I want to be more organised.
I should:
Label each sample before starting
Keep different material types separate
Photograph the sample before panning
Take notes on how each sample behaves
Work in better light where possible
Avoid checking fine material when glare is bad
Keep suspicious material completely separate
Use dedicated tools for anything that may be contaminated
Avoid processing unknown silver-looking material at home
Recheck final concentrates slowly before discarding anything
I also want to improve how I photograph the final pan.
If I am going to keep documenting this properly, I need better images of the tiny details. That may mean experimenting with phone angles, shade, water level, and maybe even a clip-on macro lens at some point.
For now, better light and more patience will have to do.
Items I have added to my Field Bag
I have recently incorporated some extra items into the bag I take with me when going out to fossick. These are:
Fine point permanent marker
Roll of large resealable zip lock bags
45x backlit magnifier
These extra items do not take up much extra space and do not weigh all that much, but I hope they will prove invaluable with my future fossicking attempts.
Final Thoughts
This was not a spectacular gold day.
It was not even a field trip.
There was no new site, no dramatic discovery, and no beautiful gold flake sitting proudly in the pan.
But it was still a productive part of the experiment.
I re-panned my own tailings.
I tested different techniques.
I worked through mica, clay, sludge, glare, misty rain, and changing light.
I found suspicious silver-looking material and treated it carefully instead of getting carried away.
And I learned that my waste pile still has value, even if that value is mostly education.
For this stage of the journey, that counts.
Not every step forward shines like gold.
Some of them look like sludge in an old children’s swimming pool.
Part of the Gold Experiment Series
This post is part of my ongoing gold fossicking and smelting experiment series:
I am usually fairly cautious when it comes to “make money online” websites.
That is not because every online earning site is bad, but because the space is absolutely full of exaggerated promises, unrealistic earnings claims, and platforms that sound far better than they actually are.
So when I do talk about one, I prefer to be very clear about what it is, what it is not, and why I personally still use it.
The site I want to talk about in this post is Serpclix, a micro-earnings style website that I first started using in early 2023.
Since then, it has continued to provide monthly payments to my PayPal account, in USD.
That does not mean it is a magic money machine. It does not mean it will replace a job. It does not mean you will suddenly be earning huge amounts online.
But it does mean something important:
For me personally, it has been consistent.
And in the world of micro-earning websites, consistency matters just as much on the ease of tasks involved.
What Is Serpclix?
Serpclix is a micro-earnings PTC website.
In simple terms, that means it gives users the opportunity to earn small amounts of money through the activities available on the platform.
The entire focus of the platform is Search Engine Results. More specifically, it is about the keywords that drive customers to specific websites.
You will earn by completing simple search oriented tasks, or orders, that become fulfilled once your click is accepted. The majority of these small tasks will take only a couple of minutes at maximum.
The important word here is small.
This is not the type of site where I would tell someone to sign up expecting a full-time income. That would be completely unrealistic, and honestly, it would be the exact kind of hype that makes people distrust online earning platforms in the first place.
I see Serpclix more as a small side earner.
It is something that can build slowly over time, especially if you are patient and realistic about it. Once you learn to combine, or stack them with other earning platforms, you have a multi-point, side income.
Why I Waited Before Writing About It
I could have written about Serpclix shortly after joining, but I did not want to recommend something too early.
A lot of sites look promising at first.
Some pay once or twice and then become unreliable. Some change their rules. Some make it harder to withdraw. Some slowly become less worthwhile over time.
That is why I think time is one of the best tests for this type of platform.
I started using Serpclix in January 2023, and since the beginning it has continued to send payments to my PayPal account on a monthly basis.
That long-term payment history is the main reason I am comfortable writing about it now.
It is not because the earnings are huge.
It is because the site has continued to do what it said it would do.
My Experience Since Early 2023
My experience with Serpclix has been fairly simple.
I signed up in early 2023, worked through the setup process, started using the site, and began receiving payments through PayPal.
Since then, the payments have continued monthly.
That is the part that stands out to me most.
With micro-earning platforms, I am not looking for hype. I am not looking for big claims. I am not looking for a site that promises the world and then makes withdrawals impossible.
I am looking for something that is realistic, usable, and reliable enough to justify the time spent on it.
For me, Serpclix has fitted that description. I have even seen how it works for long enough, that I will test out the other side of the platform in the not too distant future.
Again, I want to be very clear: this is micro-earning. The amounts are not life-changing. But the fact that it has continued paying consistently is why I still use it and why I am comfortable sharing it.
A Quick Note About the Setup Process
One thing I should mention upfront is that the initial setup can be a little bit tricky.
It is not impossible, and I would not describe it as overly difficult, but there are a few steps that may not be obvious if you are completely new to the platform.
Because of that, I have created a separate step-by-step setup guide for new users.
I recommend opening the guide before signing up, or at least keeping it open in another tab while you go through the setup process.
That way, you are not trying to feel your way through the first steps blindly.
The guide is designed to help you get your account created, confirm the important details, set up payments properly, and avoid some of the common beginner mistakes.
What I Like About Serpclix
The main thing I like about Serpclix is that it has been reliable for me. It is also extremely easy to use.
That might sound boring, but boring reliability is actually a good thing in this space.
There are plenty of online earning platforms that look exciting at first but become frustrating once you try to actually withdraw money. A site that consistently pays, even in small amounts, is much more useful than a site that makes big promises and then fails to deliver.
The second thing I like is that it fits the idea of micro-earning properly.
It is not pretending to be something it is not.
At least from my own experience, it works best when treated as a small side activity rather than a serious income source.
That distinction matters.
When people approach micro-earning sites with unrealistic expectations, they are almost guaranteed to be disappointed. But when they understand that the goal is small, steady earnings, the whole thing makes a lot more sense.
What You Should Know Before Joining
Before joining Serpclix, I think there are a few things worth understanding.
First, this is not a get-rich-quick scheme.
If you are looking for fast money or large earnings, this probably is not the right fit. Micro-earning sites are generally about small amounts that build over time.
Second, your results may vary.
Task availability, earning options, time spent on the site, and payout timing can all affect how useful the platform is for you.
Third, the setup process is worth doing carefully.
Do not rush through the early steps. Make sure your account details are correct, especially anything related to PayPal or withdrawals.
Fourth, it is best used with realistic expectations.
I personally treat Serpclix as a small extra earner. That is the mindset I would recommend to anyone else considering it.
Who Is Serpclix Best Suited For?
I think Serpclix is best suited to people who understand what micro-earning actually means.
It may be worth trying if you:
are comfortable with small, gradual earnings
have realistic expectations
are willing to follow the setup steps properly
already use PayPal
want a small side earner rather than a full income stream
do not mind checking in regularly to see what is available
It is probably not suited to people who expect immediate large payouts, passive income, or a replacement for regular employment.
That may sound blunt, but I think it is better to be honest.
The people most likely to appreciate this kind of site are the ones who understand its limits from the start.
How Much Can You Earn?
This is always the question people want answered, but it is also the question that needs the most careful answer.
I do not want to make promises about what someone else will earn.
Micro-earning results can vary depending on your location, the time you put in, the earning options available, and how the platform works at the time you are using it.
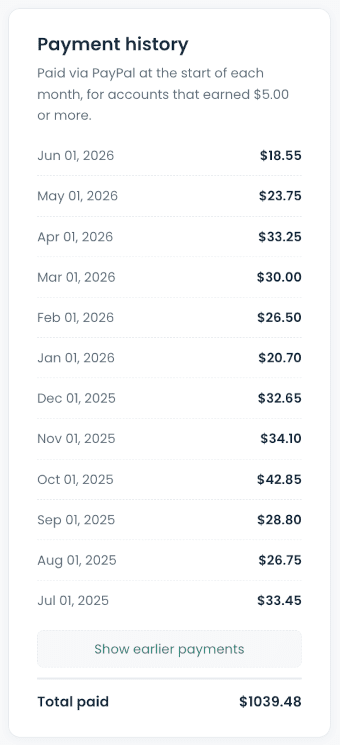
What I can say is that, in my own experience, Serpclix has provided monthly payments to my PayPal account since I started using it in January 2023. These payments have totalled $1039.48 USD to date as at June 2026.
The biggest earning month I had was May 2023, where I earned $54.15. My lowest earning month was January 2024, at $5.55.
That is the reason I still use it.
Not because it has made me rich.
Not because it is effortless.
But because it has continued to provide small, reliable payments over time.
For me, that makes it worth mentioning.
Why Payment Reliability Matters
One of the biggest issues with online earning sites is not always earning the balance.
Sometimes the bigger issue is getting paid.
A platform can look good on the surface, but if withdrawals are difficult, delayed indefinitely, or surrounded by confusing conditions, it quickly becomes frustrating.
That is why payment reliability is one of the main things I pay attention to.
In my case, Serpclix has continued to pay through PayPal monthly since the beginning, automatically, and with no need for me to make any withdrawal requests whatsoever.
That does not automatically mean every person will have the exact same experience, but it does make me more comfortable sharing my own.
For me, the site has passed the most important test:
It has actually paid. More than once.
My Honest View
My honest view is that Serpclix is worth trying if you are interested in micro-earning and you understand what you are signing up for.
I would not recommend it as a main income source.
I would not recommend it as a shortcut to financial freedom.
I would not recommend it to someone who wants big returns for almost no effort.
But I would recommend it to someone who is curious about small online earning opportunities and wants to try a site that I have personally used for a long time.
That is the key difference.
This is not me saying, “This will change your life.”
It is me saying, “I have used this since early 2023, it has kept paying me through PayPal, and it may be worth a look if you have realistic expectations.”
Getting Started
If you want to try Serpclix, I recommend starting with the setup guide first.
Some links in this post may be referral links. That means I may receive a small benefit if you sign up through my link, at no extra cost to you.
I only mention Serpclix because I have personally used it since early 2023 and it has continued to provide monthly PayPal payments during that time.
Final Thoughts
There are a lot of questionable earning sites online, and I understand why people are sceptical of them.
I am sceptical too.
That is why I prefer to judge these things by long-term use rather than first impressions.
Serpclix is not perfect, and it is not a path to instant income. But in my own experience, it has been a genuine micro-earning site that has continued to pay monthly through PayPal since early 2023.
That is why I still use it.
That is also why I am comfortable sharing it now.
Just go in with the right expectations:
Small tasks. Small earnings. Steady progress. No hype.
And if you do decide to try it, use the setup guide so the first steps are easier:
Getting started with Serpclix is not overly difficult, but the initial setup can feel a little confusing the first time through the process. The same can be said when updates are made available. That is why I created this Serpclix setup guide.
I have created this guide to minimise any friction that may arise when setting up for the first time, or performing the updates.
I have been using Serpclix since early 2023, and it has consistently provided monthly payments to my PayPal account in USD. Because of that, I am comfortable recommending it as a genuine micro-earnings site – with one important clarification:
This is not a get-rich-quick platform.
It is a micro-earnings site, which means the earnings are small, gradual, and depend on what tasks or earning options are available to you. If you go in with realistic expectations, it can be a useful little side earner.
This guide is designed to help new users get through the setup processes more easily, especially the parts that may not be obvious the first time around.
Before You Start
Before creating your account, it is worth having a few things ready.
You will need:
a valid email address
access to PayPal
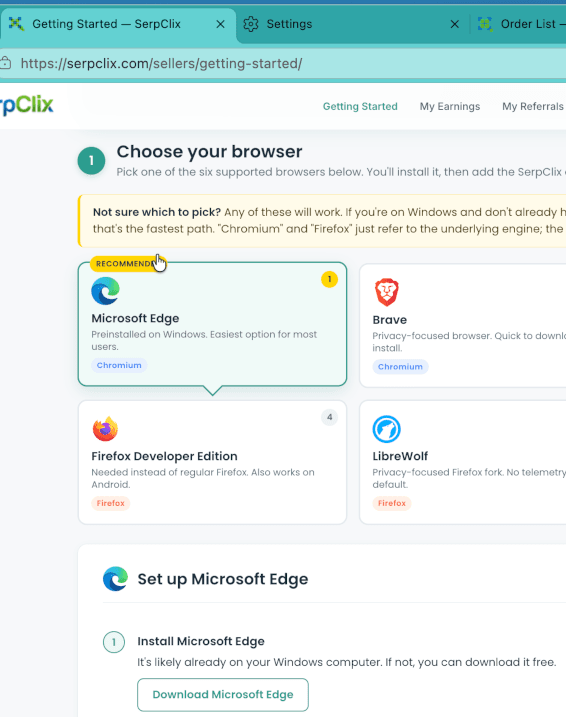
a desktop or laptop browser – Microsoft Edge is the recommendation, especially due to the extension that needs to also be installed later. I will cover that too.
a little patience during the first setup
time to read each step carefully
This particular platform will work only with a desktop/laptop setup. Mobile browsers are not supported.
As this guide uses Edge in the example, the recommendation is that you follow along using that browser. Once you have installed Edge, open this blog post in it to make the guide easier to follow along with. You can use this link (right-click->copy link or copy link address) and paste it into the Edge URL address bar.
This is a referral link. If you sign up through it, I may receive a small benefit at no extra cost to you. I only recommend this site because I have personally used it since early 2023 and it has continued to pay me.
Once the sign-up page opens, click on the ‘SIGN UP AS A CLICKER’ button.
Step 2: Create Your Account
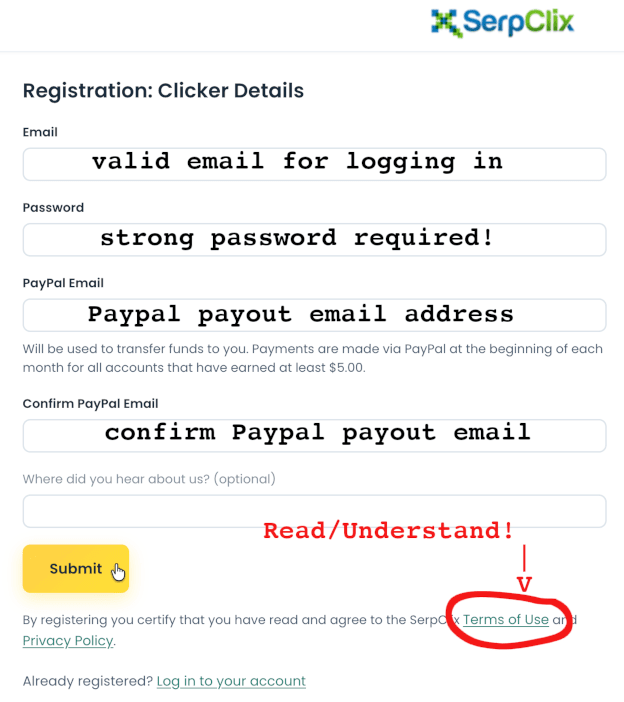
Enter the required details, such as your email address, password, and your Paypal email address. If you do not yet have Paypal, sign up for an account at Paypal.com
Make sure you use an email address you can actually access, because you may need to confirm your account before you can continue.
After entering your details, submit the registration form.
Tip: Use a strong password and store it somewhere safe. You do not want to lose access to an account that may later hold earnings or payment details. On a similar note, you want to keep it secure to prevent unauthorised access.
Step 3: Confirm Your Email Address
After signing up, check your email inbox for a confirmation message from Serpclix.
You may need to click a confirmation link before your account becomes fully active.
Also check your spam or junk folder if the email does not arrive within a few minutes.
Once confirmed, return to Serpclix and log in.
Step 4: Log In to Your Dashboard
After confirming your email, log in to your account.
You should now arrive at your main dashboard. This is where you will find your earning options, account settings, profile details, payment settings, and progress information – all under their convenient sections.
Do not worry if the dashboard feels a bit busy at first. Most micro-earning platforms have a few different sections, and it may take a little time to understand what each one does.
Step 5: Complete Your Profile
One of the most important early steps is completing your profile, and confirming that everything is correct.
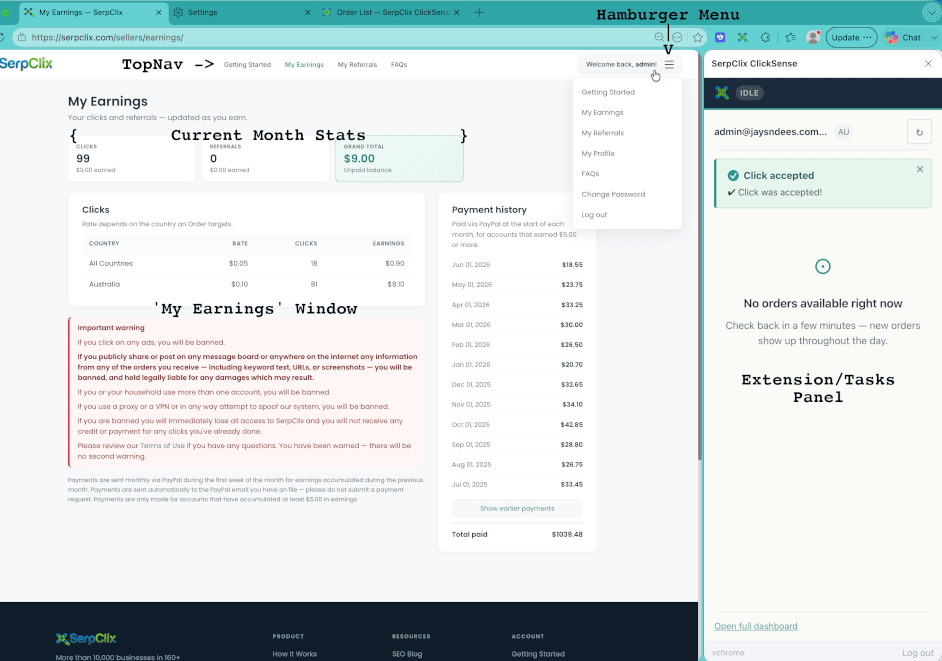
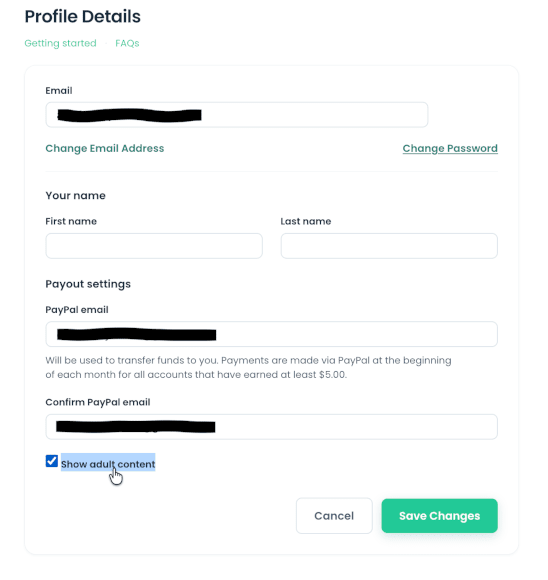
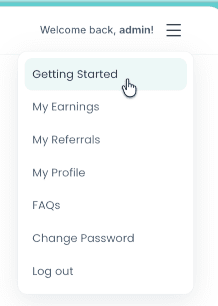
Use the Hamburger menu on the top right of the window, and select My Profile.
Check that everything is correct, and if you wish, also select the ‘Show adult content” checkbox. Obviously you will need to ensure that you are the age of majority for this one, but to date, there has been very minimal porn. The majority of ‘adult’ searches are for gambling related searches.
Do not try to ‘game’ the system by entering false information. That can lead to poor task matches, rejected earnings, or account issues later.
Step 6: Download and install the Extension Interface
Serpclix uses an extension to allow the user to interact with the earning platform.
This extension needs to be downloaded, unzipped, and added into Edge to work.
At the time of writing, the extension version is v4.0.3.
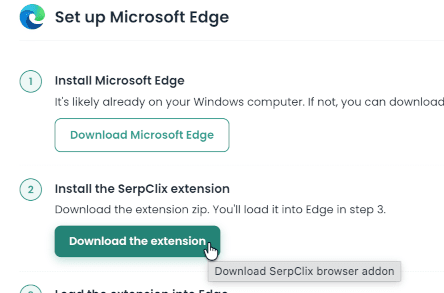
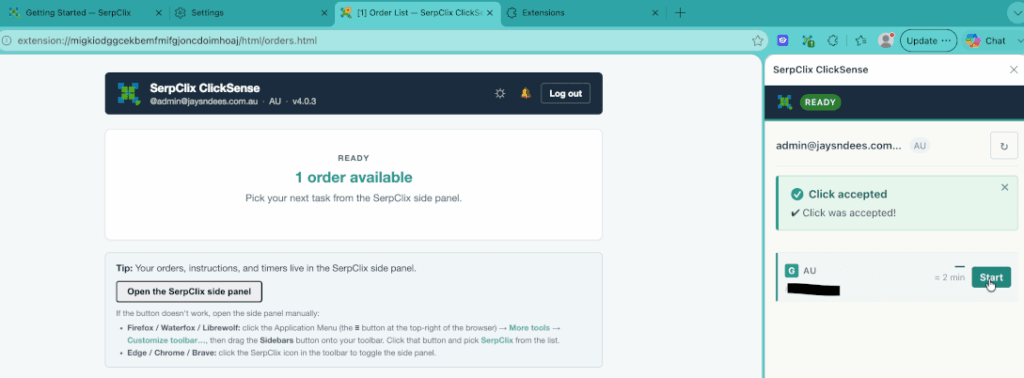
You can access the extension download link by either navigating to the ‘Getting Started’ section. This can be done either via the Hamburger menu, or the top navbar.
Click on the button ‘Download the extension’. It will not take long to download. Make sure you save the ZIP file somewhere easily accessible such as your Downloads folder, or similar.
Once it has downloaded, the next step is to extract the files. Ensure they remain in the folder once extraction completes.
Now we can load the extension into Edge.
This is completed as follows:
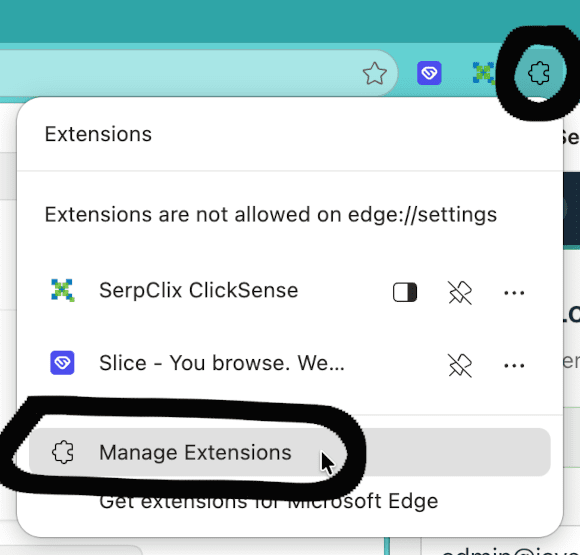
Open the Extensions window. It can be accessed via the jigsaw puzzle icon, located to the right of the address bar. Then select ‘Manage Extensions’.
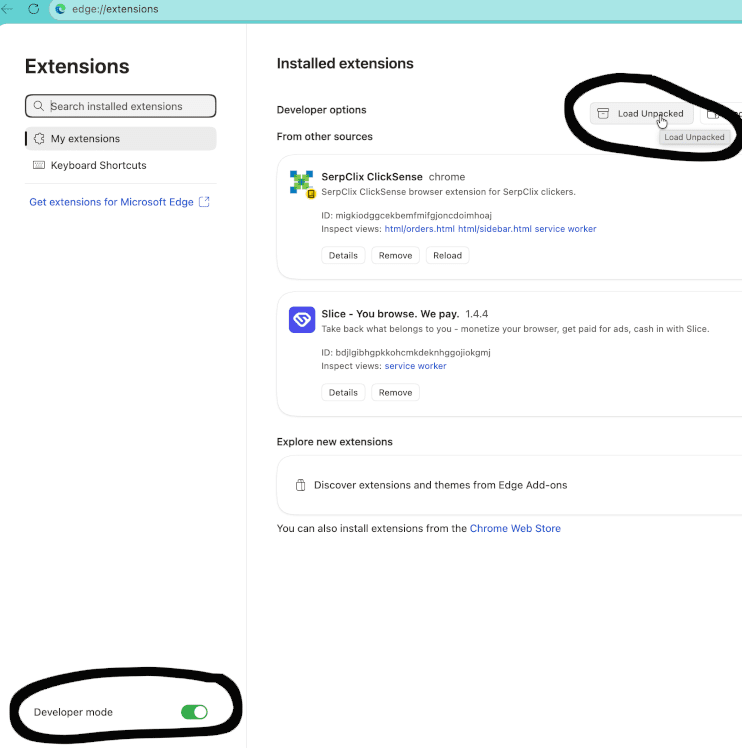
Enable Developer Mode by using the toggle at the bottom left. This step is essential as it will allow adding the Serpclix extension to Edge.
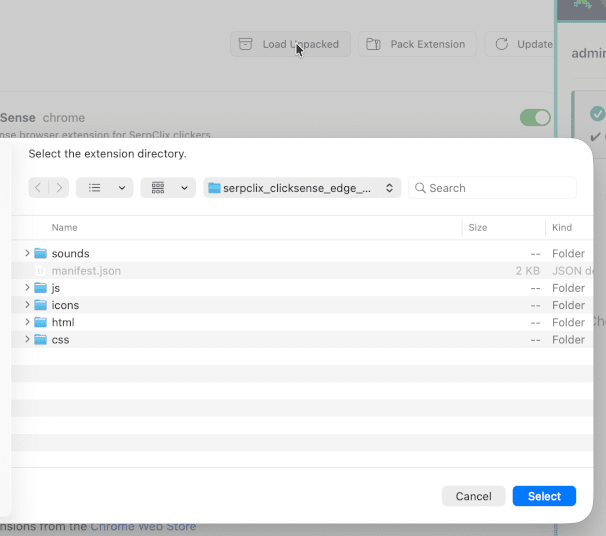
Click the ‘Load Unpacked’ button. Navigate to the location where you unpacked the ZIP file, and open the folder that it unpacked into. You should see a number of folders, and also a file called ‘manifest.json’. Click the ‘Select’ button.
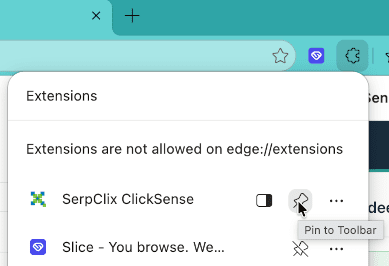
The extension will successfully install. Once complete you can close the Extensions window. Although it is installed, it is not conveniently accessible. Fix this by clicking the puzzle piece icon again, and then click on the Pin beside the extension name.
Now you can click on the newly visible icon and sign into the extension using the same credentials you chose when signing up to Serpclix.
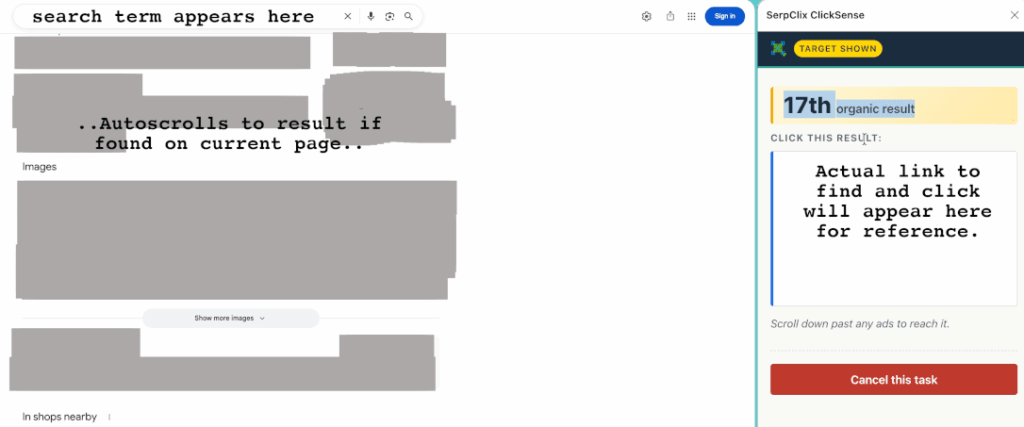
Recently with the Version 4 upgrade, the way the extension looks is different to what is shown in the Getting Started section. The process is the same, but how it is displayed is different.
First, the extension is now a side window within the main Edge browser. This makes accessing your tasks a little easier. Second, the click task no longer gets highlighted when the match is found. Instead, you are given a visual results representation to look for in the search results. Third, the extension seems to auto-logout after a period of inactivity. Check it regularly to ensure that you keep up with the tasks – they do not stay around all day, so you can not just ‘log in once a day’ and expect to be able to make anything.
Updating the Extension
From time-to-time, extension updates may become available. These will usually be bug fixes.
Updating the extension is usually done by:
Download the latest extension version and unzip it to a convenient location.
Click the jigsaw puzzle piece ->Manage Extensions
Click on the ‘Remove’ button for the Serpclix extension
Click on the ‘Load Unpacked’ button, and navigate to the new extracted folder location. Click the ‘Select’ button.
Remember to ‘Pin’ it for ease of access.
Login to the new extension interface using your credentials.
Enjoy as before.
Step 7: Your Earnings
Your earnings are automatically paid to your Paypal account within the first week of each month, provided you have reached the minimum threshold. If you haven’t quite made it, do not worry – your total will roll-over towards the next month of earnings.
You do not need to request payouts or anything like that – it is all done automatically.
You can easily access your current earnings by using the Hamburger menu, or the topnav bar, and selecting ‘My Earnings’.
Suggested screenshot: Screenshot 7: Earning options area or task menu.
Step 8: Understand the Minimum Payout
As previously mentioned, payouts are automatic – as long as you have reached a minimum $5 during the month. Payouts are made in USD.
If you do not reach the minimum for the month, they simply roll-over into the net month.
Step 9: How Do The Tasks Work?
Tasks are very easy to perform.
You are notified when there is new Task/s available.
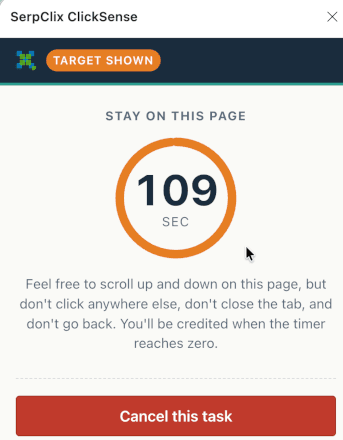
You simply click on one via the extension, paste the result into the search engine that appears (if not a direct link), and find it on the results pages. When found, you click it, and then wait for the timer to countdown. You can view the resulting page, or carry on with doing whatever else you were doing. DO NOT close the browser OR the window that opened – you will not be credited if you do!
Once the timer reached Zero, the window will automatically close, at which point you will be credited for your effort.
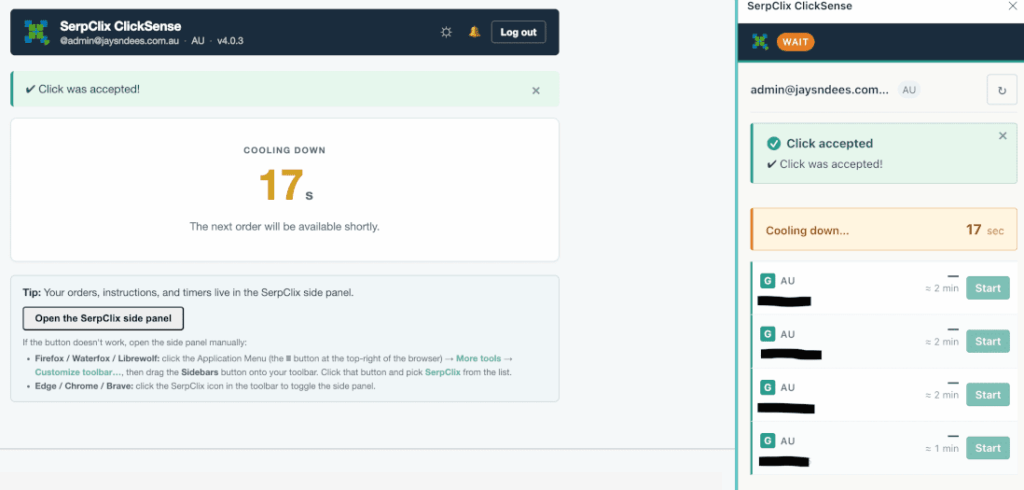
There is a 30 second ‘cooldown time’ between allowable clicks. This keeps the search engines happy.
Complete all your tasks – more get added throughout the day so ensure you check regularly!
My highest monthly total was $54.15.
Step 10: Keep Expectations Realistic
This is probably the most important part of the whole guide.
Serpclix is a micro-earnings PTC site. That means it is designed for small amounts of extra money, not a full-time income.
I personally view it as a small side earner. It has been reliable for me, and the monthly PayPal payments are the reason I still use it, but I would never describe it as life-changing money.
I admit, I get a little bit excited at the end of each month. Especially if USD to AUD is on the more favourable side of $1.50+. But I am still happy with the results each month – as long as they stay above 1:1.
The best way to approach it is:
small tasks, small earnings, steady progress.
If you expect it to replace a wage, you will probably be disappointed. If you treat it as a small extra earner, it makes much more sense.
Common Beginner Mistakes to Avoid
Rushing through the setup
It is better to spend a few extra minutes getting your profile and payment details right, and reading through the Terms of Service than to run into problems later.
Using the wrong PayPal email
Double-check your PayPal email before a payment is sent.
Expecting large earnings immediately
This is micro-earning. The amounts are small, but they are consistant.
Ignoring payout rules
Always check the minimum payout, and the accompanying conditions. Minimum payout is $5, and is paid within the first few days of the new month for previous month earnings.
Trying too many tasks at once
You can only complete a single task at a time.
Giving false profile information
Be honest with your profile details. Incorrect information can cause issues with task matching or account reliability.
Is Serpclix Worth Using?
For me, yes – but with realistic expectations.
I have used Serpclix since early 2023, and it has continued to provide monthly PayPal payments. That consistency is the main reason I am comfortable writing about it.
However, I would not recommend it to someone expecting quick or large earnings.
It is better suited to people who understand micro-earning sites and are happy to build up small amounts over time.
Final Thoughts
The initial setup for Serpclix can be a little tricky, but once the account is created, confirmed, and linked to PayPal, it becomes much easier to understand.
My advice is to take your time, follow the steps carefully, and treat the site as a small side earner rather than a major income source.
And once again, keep expectations realistic. This is not a get-rich-quick scheme. It is simply a micro-earnings site that, in my own experience, has continued to pay reliably since early 2023.
The night before this fossicking trip, I had a dream that I was panning in a specific section and found a gold nugget about the size of my head.
That did not happen.
Not even close.
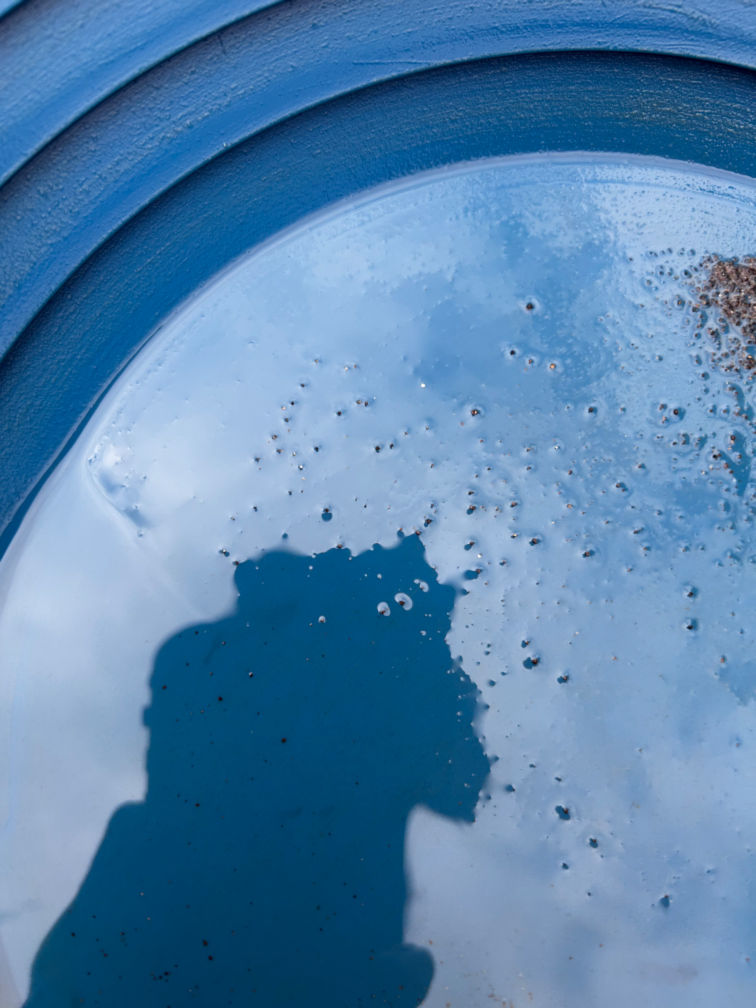
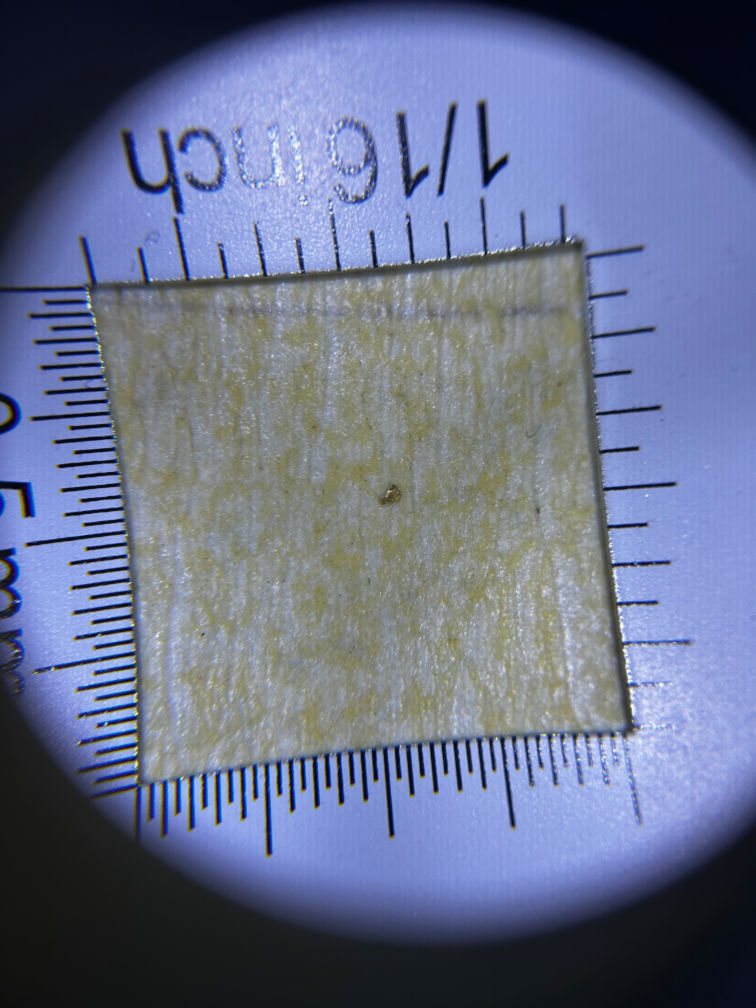
What I may have found instead was a tiny fleck of gold – which is much less dramatic, but probably far more believable.
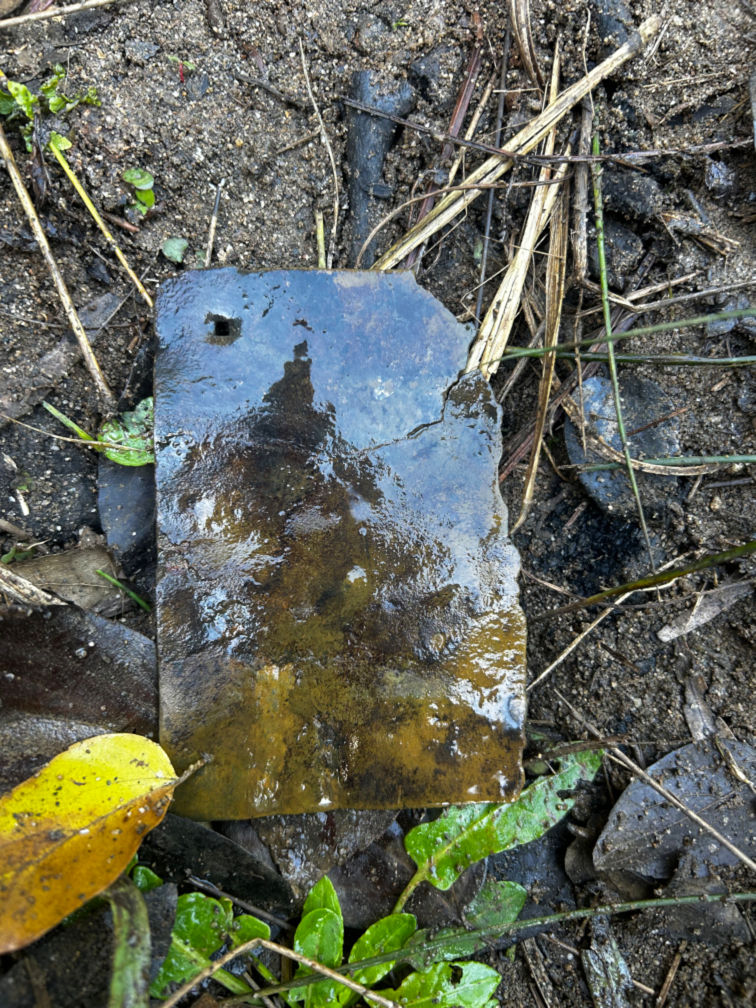
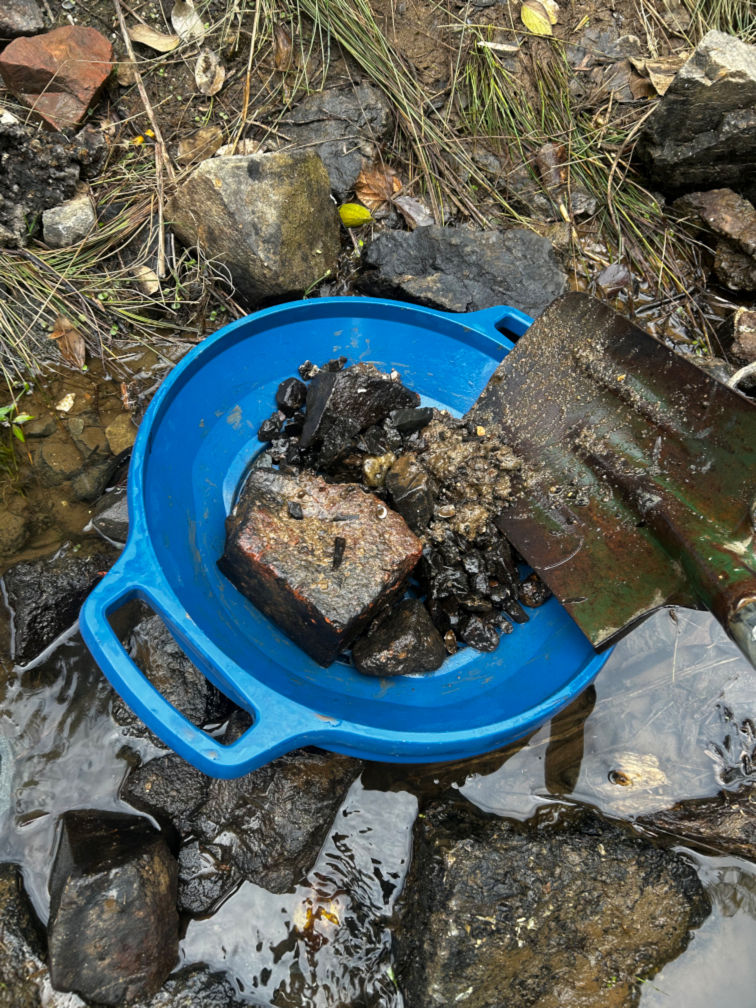
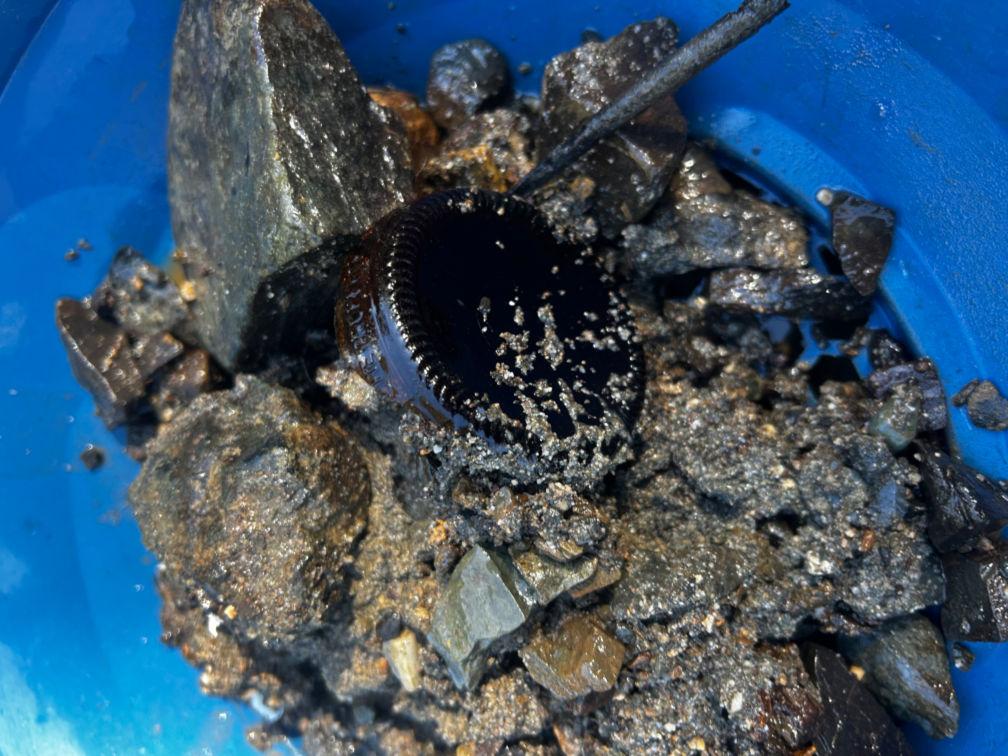
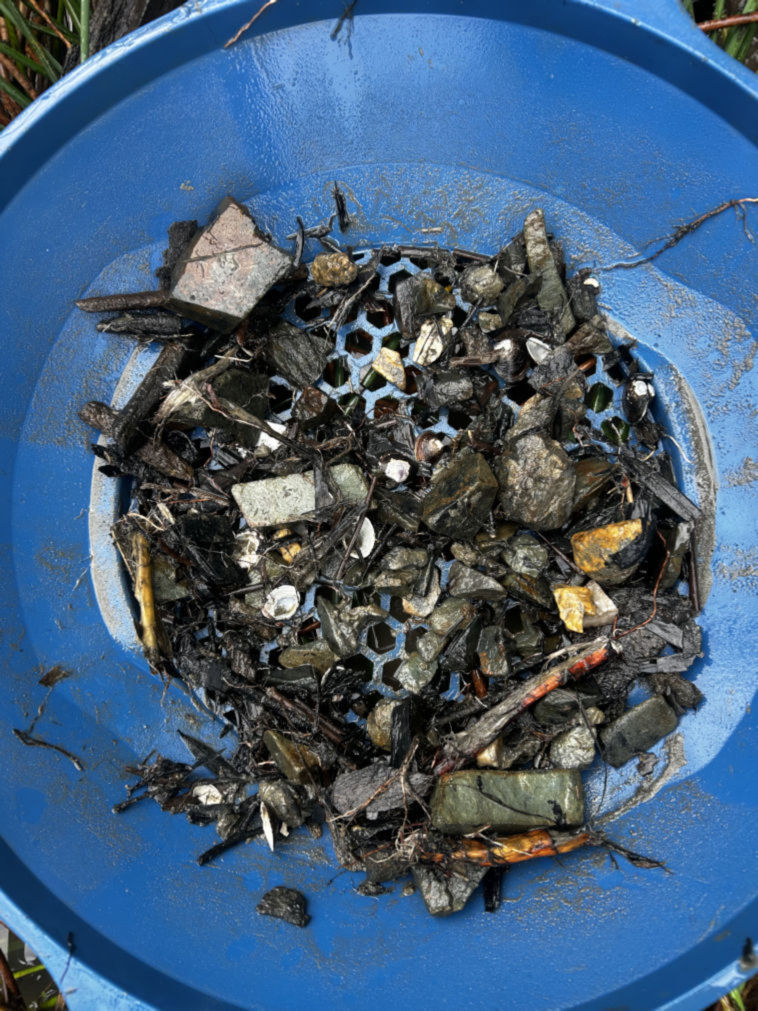
I also found part of an old baking tray, some copper wire, a rusty chunk of metal, a hook and sinker, a few cans, some interesting quartz, and possibly something that needs to be treated very carefully.
So no, it was not the dream nugget.
But it was still a very useful day.
Where This Attempt Fits Into the Bigger Gold Experiment
After my first smelting attempt, it became obvious that the material preparation stage matters a lot. So this trip was not just about chasing gold. It was about looking more carefully at where I sample, how long each site actually takes, what kind of material I bring home, and whether any of it is worth processing further.
The Original Plan
My original plan was to visit a few different areas and spend roughly an hour sampling each one. I packed the basic kit: pan, classifiers, screwdriver, prybar, vials, snuffer bottle, shovels, buckets, the cheap metal detector, and a small hand-cranked blower for clearing loose leaves from cracks and crevices.
I also took my phone, because I expected the day would probably become part of this series whether I found anything or not.
I quickly realised that properly sampling, photographing, panning, checking, and recording even one location takes longer than I expected.
The Actual Day: Slower, More Focused, and More Useful
As usual, the plan changed once I was actually out there.
Instead of trying to rush through too many spots, I ended up focusing on three locations that I had either not visited before or had not spent much time at. I will refer to them here simply as Site 1, Site 2, and Site 3.
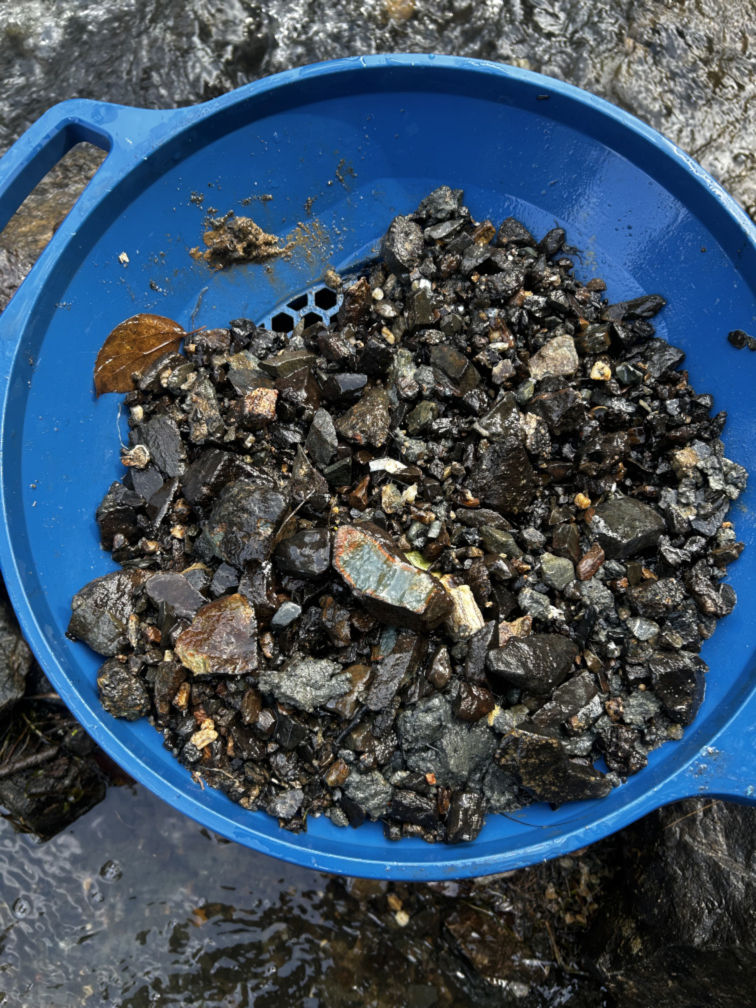
That turned out to be the better decision. Properly checking even one location takes longer than I expected. By the time I had looked around, taken photos, collected material, classified it, panned it down, checked the results, and bagged concentrates for later, an hour disappeared very quickly.
Why I Am Keeping the Locations General
I am deliberately keeping the locations general in this post.
Instead of naming exact spots, I will refer to them as Site 1, Site 2, and Site 3. The point of this series is to document the learning process, not to send people to specific patches of ground to dig up.
Some areas already show signs of being heavily worked, and I do not want to add to that problem by turning this into a location guide.
Site 1: Detector Distractions and No Obvious Gold
This particular site was chosen due to some of the stereotypical features that are seen to capture gold – inside bend, well-rooted vegetation, clay areas, submerged logs, multiple low pressure areas.
Site 1 did not produce anything significant while I was there.
I still have a small bag of final concentrates from this site that I need to pan out properly at home, so I cannot completely write it off yet. But in the field, there was nothing that stood out as obvious gold.
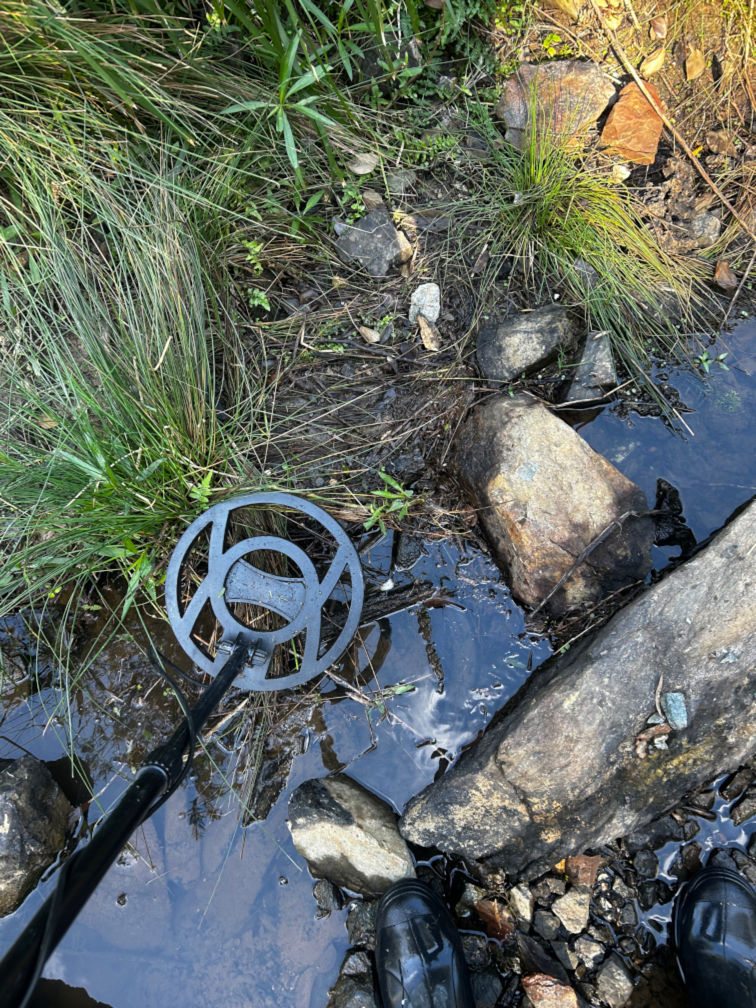
The metal detector did get involved, though. It was very enthusiastic in finding things for me.
Unfortunately, it did not lead me to the dream nugget. It led me to part of an old baking tray, 2 aluminium cans and a piece of copper wire.
Not exactly treasure, but at least it proved the detector could find something.
Site 2: A Heavily Worked Common Area
I investigated this area as it is one of the more easily accessible places. There is plenty of rocks of varying sizes, rapids and ripple systems, and enough vegetation to keep it interesting.
Site 2 looked like it had already seen a lot of attention.
There were signs of extensive sluice work, along with holes in creek banks. That was disappointing to see. Not just because heavily worked ground may be less likely to produce anything interesting, but because damaged banks and unfilled holes are exactly the kind of thing that gives fossicking a bad name.
I did not find anything obvious there, but I still brought home a small bag of concentrates to check properly later.
At this stage, Site 2 feels like the least exciting of the three.
Site 3: The Most Interesting Site of the Day
Site 3 was easily the most interesting location of the day.
It started promisingly when the metal detector screamed at me. Naturally, that gave me a brief moment of hope. Maybe this was something interesting. Maybe this was the day’s first real find.
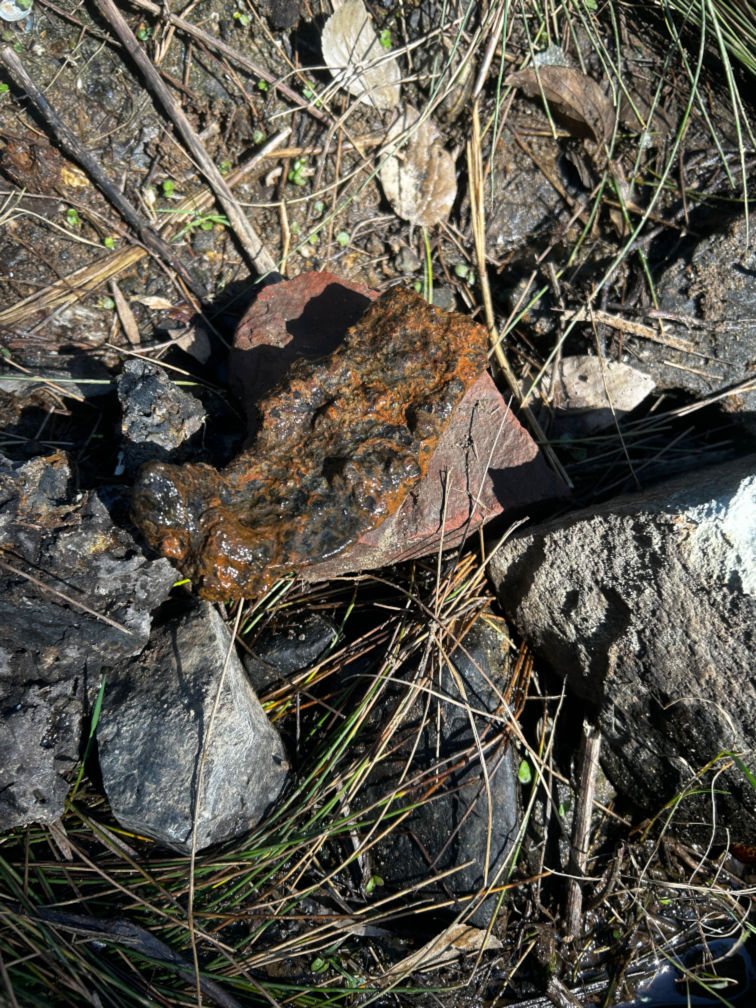
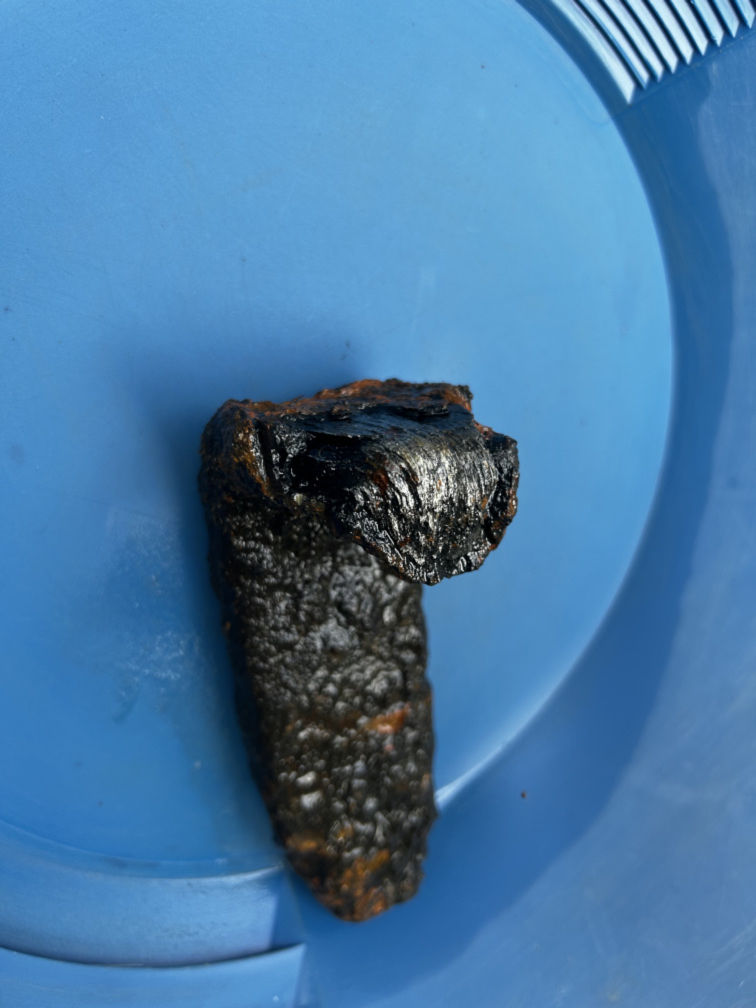
It was a chunk of old rusty metal.
So the detector had once again done its job, just not in the way I wanted.
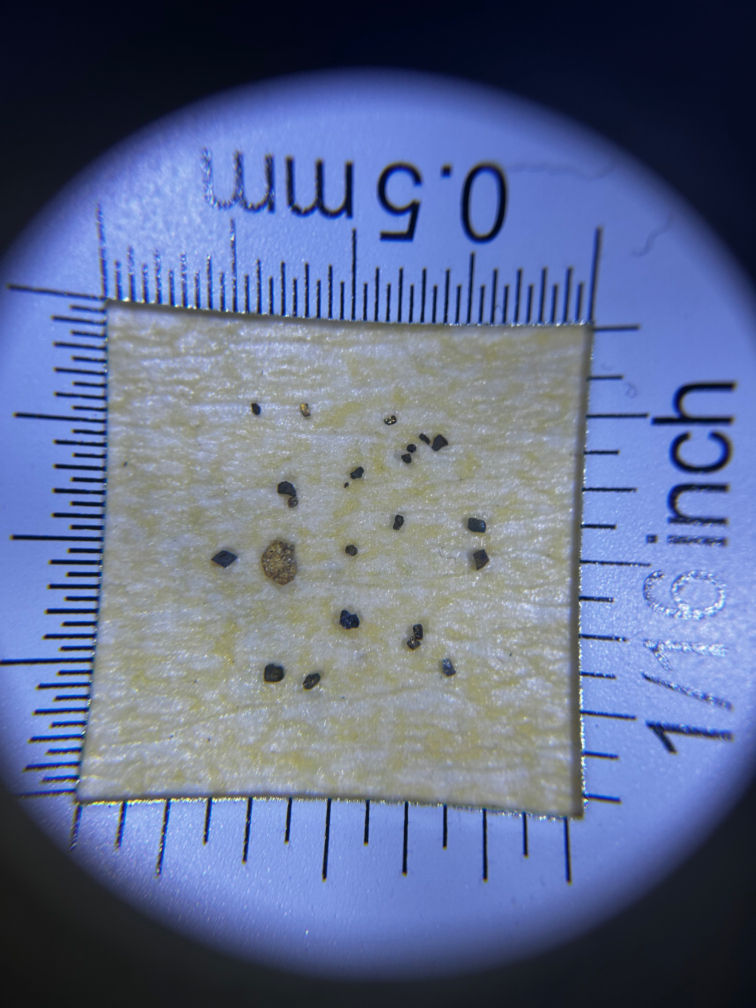
But Site 3 was still the site that made the day worthwhile. This was where I found the tiny possible fleck of gold, and it was also where I found the most interesting material overall.
The Possible First Fleck of Gold
I am being careful with the wording here.
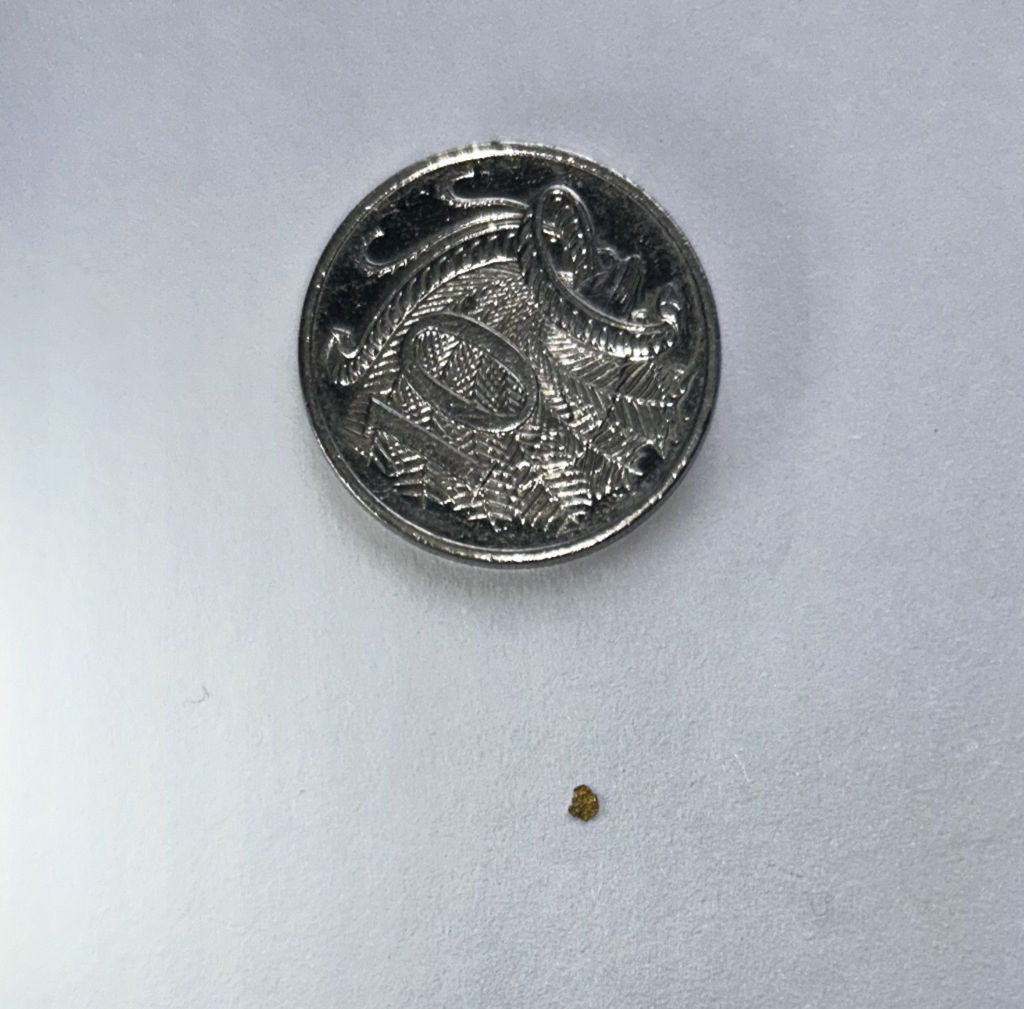
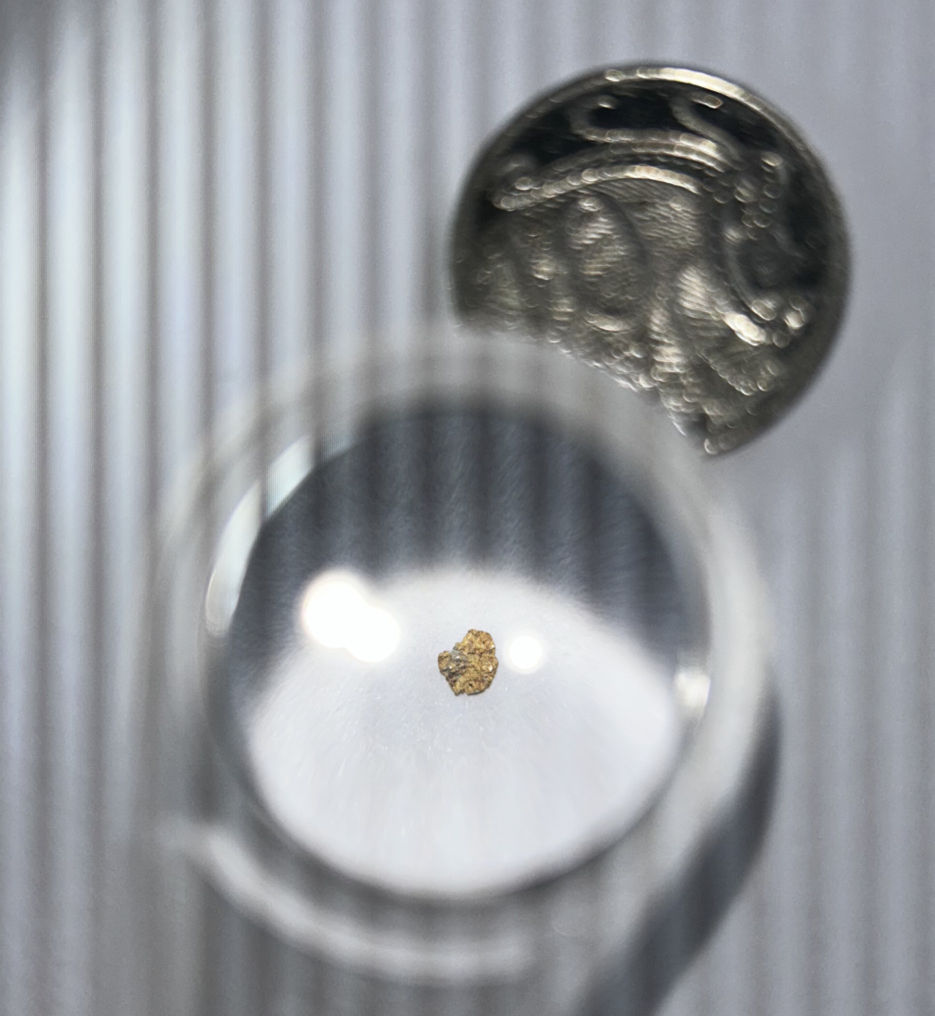
I think I may have finally found a fleck of gold.
It was tiny. Very tiny. Definitely not the head-sized dream nugget.
But it looked enough like gold to make me stop and pay attention, and I was able to isolate it fairly quickly in the pan. That was what made it feel different from the usual shiny distractions.
I am not going to claim it as confirmed gold with absolute confidence yet, but it is the closest thing I have found so far. It is not magnetic, and it bends when pressure from a fingernail is applied.
For this stage of the journey, that felt like a real step forward.
The Metal Detector Distraction
One of the more interesting lessons from the day was that I may not have needed the metal detector at all.
It certainly found things. Unfortunately, those things were aluminium cans, part of an old baking tray, a bit of copper wire, and a chunk of rusty metal.
It added excitement every time it screamed, but that excitement usually ended with rubbish.
I am not ruling it out completely, but for this kind of sampling trip, the detector may have been more of a distraction than a useful tool.
Suspicious Shiny Silver Balls in the Sample
Site 3 also produced something I am treating very carefully.
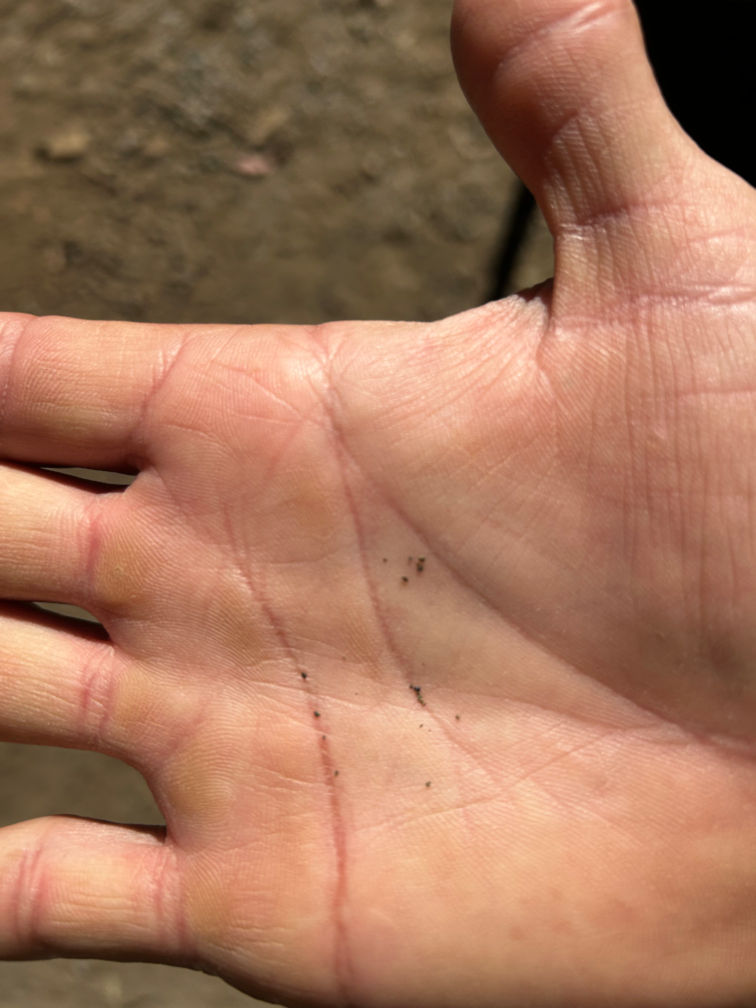
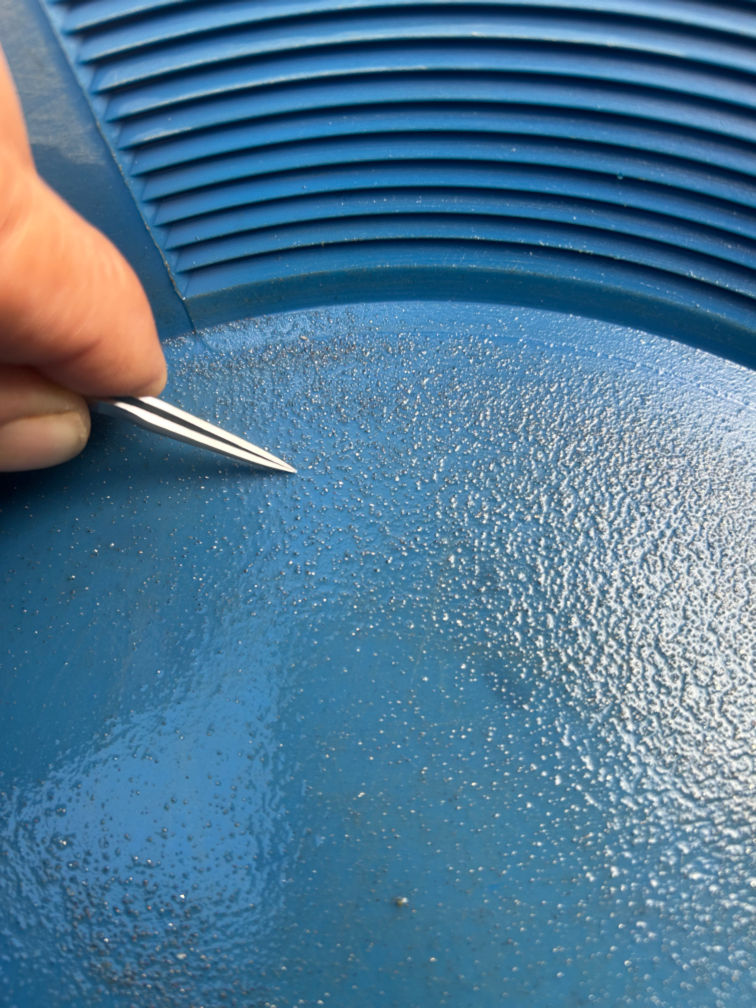
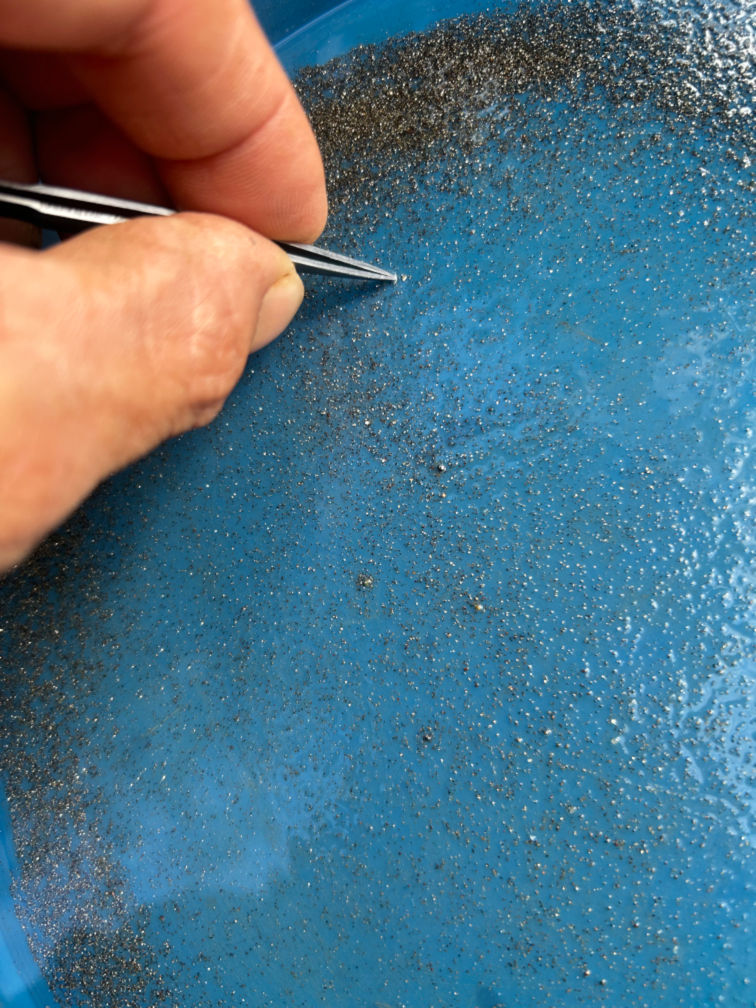
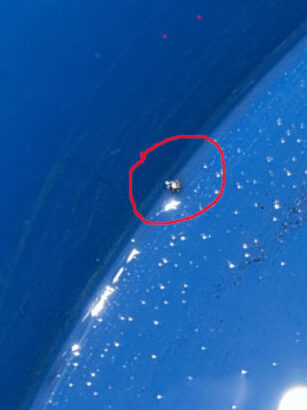
In the sample bag I brought home, I noticed a number of very shiny silver-looking balls. They are different sizes, and I am not absolutely certain what they are. They remind me of ball bearings – except they should not look so shiny and new, when everything else around it has been aged and weathered.
I am not claiming they are mercury.
But I am also not going to play around with them to find out. The safest thing I can do, is coat them in sulfur. Until then, it will not be stored at room temperature, or dry. This should reduce the chances of those dangerous gases from being released and causing some serious harm.
I did not handle them in the field, and I will not be heating, crushing, smelting, or casually testing that material. For now, the sample is being treated as suspicious and kept separate.
Old gold areas can contain all sorts of unexpected material, including rusted metal, lead, glass, and possibly contamination from historical gold recovery. This was a good reminder that fossicking is not just about looking for shiny things. Sometimes the shiny thing is exactly what you should leave alone until you know more.
Interesting Quartz Pieces
I also found a couple of quartz pieces that stood out because they looked different from what I had noticed on previous fossicking trips.
One piece was a light pink colour. The other was very dark orange on the outside, but where a small chip came off, the inside was a much lighter orange.
I am not treating these as proof of gold. Quartz on its own does not mean gold is present.
But in an old gold area, interesting quartz is still worth documenting. At the very least, it helps me pay more attention to the type of ground I am working in, the staining, the weathering, and the material that keeps turning up in different areas.
Taking the Rubbish With Me
One thing I did make sure of during the day was that the rubbish I found did not stay there.
The detector did not find gold, but it did help me find rubbish. The cans, hook and sinker, baking tray piece, copper wire, and rusty metal were all taken with me for proper disposal.
It was not the treasure I was hoping for.
But removing rubbish from the area still felt like a worthwhile result.
If I am going to spend time in these places, take photos, sample material, and write about the process, then I should also leave the area a little better where I can.
What Made the Day Productive
On paper, the day was not especially fruitful.
I did not come home with the dream nugget. I did not fill a vial with gold. I did not even confirm the possible fleck yet.
But the more I think about it, the more useful the day actually was.
I tested three locations properly. I took photos. I brought home concentrates to check more carefully. I found one possible fleck of gold. I learned that the detector may be more distracting than helpful for this type of trip. I noticed quartz I had not seen before. I removed some rubbish. And I was reminded to treat unknown shiny material with caution.
That is a productive day, even if it does not look dramatic.
What I Would Do Differently Next Time
The biggest thing I would change next time is my expectation of time.
One hour per site sounds reasonable until I actually try to inspect, sample, photograph, pan, check, bag, and clean up properly. Three sites may already be enough for one trip if I want to do them properly.
I would also be more deliberate with sample labelling, take more close-up photos of the final concentrates, and think carefully about whether the metal detector is worth carrying unless I am specifically doing a detector-focused outing.
The other obvious lesson is to keep unknown material separate and not rush into processing anything that looks suspicious.
Final Thoughts: Not the Nugget, But Still a Step Forward
The dream nugget did not show up.
No head-sized lump of gold. No dramatic discovery. No life-changing moment in the bottom of the pan.
But I may have found my first real fleck of gold, and that feels like a much more realistic milestone for where I am in this process.
More importantly, I came home with better notes, more photos, a clearer idea of how long proper sampling takes, and a few lessons I would not have learned by sitting at home watching other people find gold online.
That is the point of this series.
Not instant success.
Not pretending I know more than I do.
Just learning gold the hard way, one small field test at a time.
Part of the Gold Experiment Series
This post is part of my ongoing gold fossicking and smelting experiment series:
Yesterday I ran my very first gold smelting attempt.
I would love to say it ended with a neat little button of gold, sitting there like proof that I knew exactly what I was doing.
That is not what happened.
But that is also the point of this post – and probably this whole gold experiment series.
I am not documenting this because I have already mastered the process. I am documenting it because I am learning it from the ground up. That means the failures, the ugly results, the underwhelming first attempts, and the parts where I have to stop and admit that I clearly need to improve something before trying again.
This first smelting attempt was not what I would happily call a success.
But it was a start.
And sometimes the start is messy.
Where This Attempt Fits Into the Bigger Gold Experiment
The broader goal is to learn the full process properly, from finding and collecting material through to processing, separating, testing, and eventually attempting small-scale smelting.
I am not approaching this as an expert.
I am approaching it as someone who is interested, curious, and willing to learn by doing – even when doing leads to less-than-glamorous results.
That is exactly what happened here.
This was my first real smelting operation, and it has already shown me that there is a large difference between understanding the idea of smelting and actually getting a good result from it.
The Goal of the First Smelt
The goal of this first attempt was fairly simple:
I wanted to see whether I could take gold-bearing material or concentrates and produce some kind of visible result from a small smelting process.
Not necessarily a perfect result.
Not even necessarily a clean result.
Just something that would help me understand the process better.
I wanted to test the basic workflow:
Prepare the material
Add flux
Heat it properly
Allow the material to melt and separate
Cool it down
Inspect the result
Work out what went wrong or what needs improving
That was the plan.
The reality was not quite as straightforward.
The Material I Started With
For this first attempt, I used material that I had collected and processed from my fossicking efforts.
At this early stage, I am still learning how well I am actually preparing the material before it gets anywhere near a crucible.
That is already one of the biggest lessons from this attempt.
Smelting is not magic.
If the material going in is not properly prepared, concentrated, cleaned, or understood, then the result coming out is probably going to be confusing.
For this attempt, the material included:
Source material: panned concentrates collected from recent fossicking trips
Approximate amount: less than 100g
Visible gold before smelting: uncertain
Amount of black sand or heavy material: moderate
Preparation before smelting: concentrates were re-panned at home to further separate undesirable materials, magnet used in wet material to collect the magnetic materials, panned again and then placed into stainless steel pot to heat until completely dry.
Looking back, I suspect this is one area I need to improve before the next attempt.
I may have been too eager to get to the smelting stage before I had properly refined and cleaned the material.
That is a very easy mistake to make, because smelting is the exciting part.
But the exciting part probably depends heavily on the boring preparation part.
The Setup
My setup for this first smelting attempt was basic.
That is not a complaint. It is just the truth.
I am not using professional refining equipment or a commercial setup. This is a small-scale learning process, and the equipment reflects that.
For this attempt, I used:
Crucible: 3kg graphite crucible
Flux: homemade anhydrous borax, soda ash (sodium carbonate); 25% of raw material each
Cooling method: steel bucket containing cold water
Mould or receiving surface: graphite moulds
The setup was enough to run the attempt, but I am not yet convinced it was enough to run the attempt well.
That distinction matters.
It is one thing to get material hot.
It is another thing entirely to get the right material hot enough, for long enough, in the right conditions, with the right preparation and flux balance.
That is where I still have a lot to learn.
What Happened During the Smelt
Once everything was set up, I added the prepared material and flux to the crucible and began heating.
At first, things looked promising enough.
The material responded to the heat, and there were visible changes as the process continued. But as the attempt went on, it became clear that I was not heading toward the clean result I had imagined.
The first observations I noticed as the temperature was rising, was the foul-smelling brownish-yellow smoke coming from the top of the furnace. It was very much like a rotten egg smell – an indication of sulfides. I am extremely glad that I was outside performing this smelt, and that I had a breathing apparatus handy. The gas emitted, was Hydrogen Sulphide, which is quite toxic.
As the smelt progressed, the smoke coming from the top vent on the furnace lessened, which I took to be a good sign that it had burnt off.
I commenced preheating the graphite moulds with a butane torch, along with a graphite stirring rod.
Once it had been sitting on 1100 degrees Celcius for around 10 minutes, I opened the top and stirred it with the graphite rod, and then closed it back over.
I then proceeded to pour the contents of the crucible into the mould.
Instead of a clear separation and an obvious metallic button, the result was more uncertain.
The material appeared to very quickly turn from an orange-red colour to a dark red and grey colour, allowing no time at all to perform a hot separation process. I flipped the experiment onto a steel plate and picked it up with steel tongs, quickly submerging it into the cold water. There was no satisfying pop, sizzle, or anything remotely like that.
Instead, the mass simply crumbled and sunk to the bottom of the bucket, turning the water a black colour as it did so. And the smell – it was back seemingly worse than before! The respirator went back on, and I then recovered as much of the crumbled glass material as possible, washing and panning and rinsing the material until the water was much clearer than ‘black’. The washed material is now set aside, drying so that I can crumble the glass back down into a powder to be smelted again – with higher flux ratios to account for the sulfides within the concentrates.
These were the moments where the difference between “watching smelting videos” and “actually doing it yourself” became very obvious.
In a successful-looking smelt, you expect some kind of confidence in the outcome.
In this attempt, I mostly ended up with questions: Was there not enough gold in the material? Was the material not clean enough? Was the heat insufficient? Was the flux wrong? Was the ratio wrong? Did I rush the process? Did I misunderstand what the input material actually contained?
At this stage, I do not have a perfect answer.
But I do have a result to learn from.
As a plus note, there does appear to be at least some gold in the glassy black mess. I can see some flecks, but it does not seem like they got to a molten state.
The Result
The final result was not a clean little gold button.
That would have been nice.
Instead, I ended up with sludge and glass mixture that possibly contains small metallic-looking specks.
It was not useless, though.
A failed result still gives information.
It told me that my process needs work. It also reminded me that the quality and preparation of the material before smelting is probably more important than I wanted to admit going in.
The result may not have looked impressive, but it has given me a baseline.
This is attempt number one.
From here, I can compare future attempts against it.
If the next result is cleaner, I will know I improved something.
If the next result is just as bad, I will know I still have a deeper issue to solve.
Either way, the process now has a starting point.
What I Think Went Wrong
I do not want to pretend I know exactly what went wrong yet.
But I do have a few likely suspects.
1. The material may not have been prepared well enough
This is probably the biggest one.
I may need to spend more time separating, cleaning, drying, and concentrating the material before attempting another smelt.
If too much unwanted material is going into the crucible, then I am making the smelting stage harder than it needs to be.
2. There may not have been enough gold in the sample
This is the very unromantic possibility.
Maybe the material simply did not contain enough gold to produce a visible result.
That is not failure by itself. It just means I need to test better samples and not assume that heavy material automatically equals a worthwhile smelt.
3. The heat may not have been right
Smelting is not just about applying heat.
The material needs to reach the correct temperature and stay there long enough for the process to work properly.
If the heat was too low, uneven, or not sustained for long enough, that could explain part of the result.
4. The flux mix may need improvement
Flux is one of those areas where I clearly need to learn more.
The wrong amount, wrong type, or wrong balance could easily affect how well the material melts, separates, and forms slag.
For this first attempt, I was mainly trying to get the process moving.
For the next attempt, I need to be more deliberate.
5. I may have rushed into smelting too early
This might be the most honest answer.
I wanted to try the smelting stage.
That is understandable.
But I may have jumped ahead before the material was ready.
The next attempt should probably start much earlier in the process, with better preparation and better observation before anything goes into the crucible.
What I Learned From This First Attempt
Even though this first smelting attempt was not a success in the way I had hoped, it was still useful.
The main lessons so far are:
Smelting is not a shortcut around poor preparation
Concentrates need to be properly cleaned and understood
A visible result depends heavily on what is actually in the sample
Heat, flux, and timing all matter
A failed first attempt is still a useful reference point
I need to slow down and improve the steps before the smelt
The biggest lesson is probably this:
The smelting stage is only as good as everything that happens before it.
That feels obvious now.
It did not feel quite as obvious before I tried it.
What I Will Change Next Time
Before I run another smelting attempt, I want to improve the preparation stage.
The next attempt should include:
Better classification of the material
More careful panning and separation
Less unwanted material going into the crucible
A clearer idea of whether visible gold is present
Better notes on sample size and source
More deliberate flux use
More careful observation of heat and melt behaviour
Photos or video at each stage, if practical
I also want to keep better records.
For the next smelt, I should be able to write down:
Where the material came from
How it was processed
How much material was used
What flux was used
How long it was heated
What the material looked like during the process
What the final result looked like
What changed compared to this first attempt
That way, this becomes more than just “try again and hope”.
It becomes a proper learning process.
Was This First Smelt a Failure?
Yes and no.
If the goal was to produce a clean gold result, then yes, this attempt failed.
If the goal was to begin learning the process, then no, it did exactly what a first attempt often does.
It showed me that I do not yet know enough.
It exposed weak points in my setup and preparation.
It gave me questions to answer before the next attempt.
And it gave this whole series a very honest beginning.
That is probably better than pretending everything went perfectly.
The Honest Starting Point
There is something fitting about starting this gold experiment with a failed smelt.
Gold has a reputation for being shiny, valuable, and exciting.
But the process of getting it, cleaning it, separating it, and trying to turn it into something useful is not always shiny at all.
Sometimes it is dirt.
Sometimes it is black sand.
Sometimes it is slag.
Sometimes it is a disappointing lump that makes you question what you actually did.
But that is the process.
And this is where mine begins.
Next Step
The next step is not simply to smelt another batch and hope for a better result.
The next step is to go backwards.
Back to the material.
Back to the concentrates.
Back to the preparation.
Before I attempt another smelt, I need to make sure the sample going into the crucible is actually worth smelting and has been prepared properly.
That will likely be the focus of the next update.
For now, this first attempt stands as the beginning of the record.
Not a success.
Not a disaster.
Just the first real step in learning gold the hard way.
Part of the Gold Experiment Series
This post is part of the jaysndees ongoing gold fossicking and smelting experiment series:
Testing ideas, running small projects, and trying new systems are some of the best ways to learn how things actually work in the real world.
But experimentation has a hidden risk.
Sometimes the hardest part of running an experiment isn’t starting it.
It’s recognising when to stop.
Stopping an experiment can feel like failure. Time was invested. Effort was spent. There may even have been early signs of success.
But learning when to step away is part of the experiment itself.
In fact, knowing when to stop is often what turns experimentation into a useful system rather than an endless distraction.
Not Every Experiment Is Meant to Last
One common misconception about projects is that success means continuation.
In reality, many useful experiments are temporary by design.
Their purpose is to answer questions like:
Does this system work in practice?
Are the costs sustainable?
How much time does it actually require?
Does it create more problems than it solves?
Once those questions are answered, the experiment has served its purpose.
Continuation is optional.
The Difference Between Exploration and Commitment
Experiments exist in a different category from long-term systems.
Experiments are exploratory.
They are meant to test assumptions, gather information, and expose unknown variables.
Long-term systems are different.
They exist because they already proved their usefulness.
Confusing these two categories can lead to unnecessary persistence.
Just because an experiment started does not mean it must become a permanent system.
The Cost of Continuing Too Long
Continuing an experiment beyond its useful life can create hidden costs.
These costs appear in several forms:
time investment
financial cost
mental energy
opportunity cost
Opportunity cost is particularly important.
Every hour spent maintaining a weak experiment is an hour not spent improving stronger systems.
Eventually, weak projects begin to crowd out better ones.
Recognising Early Signals
In many cases, experiments give signals fairly quickly.
Some of these signals are positive.
Others suggest the system may not be sustainable.
Examples include:
operating costs exceeding expectations
maintenance effort increasing over time
dependence on unstable platforms
diminishing returns on effort
These signals do not necessarily mean an experiment must stop immediately.
But they do suggest closer evaluation is necessary.
When Economics Change
Some experiments begin under favourable conditions.
Those conditions can change.
Markets shift. Costs rise. Platforms update their rules.
An experiment that made sense initially may stop making sense later.
This is particularly visible in technology and digital infrastructure.
One example was analysing the real cost of GPU crypto mining in Australia. On paper the economics appeared promising, but over time operational costs and market conditions shifted enough that continuing the experiment no longer made sense.
The experiment itself was still valuable.
It produced information.
But the long-term model did not hold.
Platform Risk Can Change the Equation
Another reason experiments sometimes end is platform dependency.
Projects that rely heavily on third-party systems inherit those systems’ risks.
Platforms may:
change verification requirements
alter content policies
adjust monetisation rules
modify algorithms
When that happens, an experiment that once worked can suddenly encounter friction.